


Knitting Tutorial: How to Wind a Skein of Yarn into a Center Pull Ball
A neat, tidy center pull ball of yarn makes it easier to manage a knitting project.
There are several ways to wind a skein of yarn into a ball. For years, I simply wound the yarn into a ball and did not realize how easy it was to make a “center pull” ball of yarn.
If you haven’t invested in a ball winding tool (such as a Knitter’s Pride Wool Winder or Knitter’s Pride Natural Series Ball Winder), you can use your hands to wind a skein of yarn into a center pull ball.
Even if you already have a ball winder, this technique can come in handy if you are away from home and want to wind up a skein of yarn that you purchased at a yarn festival, yarn show, or local yarn shop.
THIS BLOG POST INCLUDES:
Definitions for yarn related terms: skein of yarn, pull skein of yarn, ball of yarn, center pull ball of yarn, yarn cake, swift, and ball winder.
Step-by-step tutorial for how to wind a center pull ball of yarn using your hands.
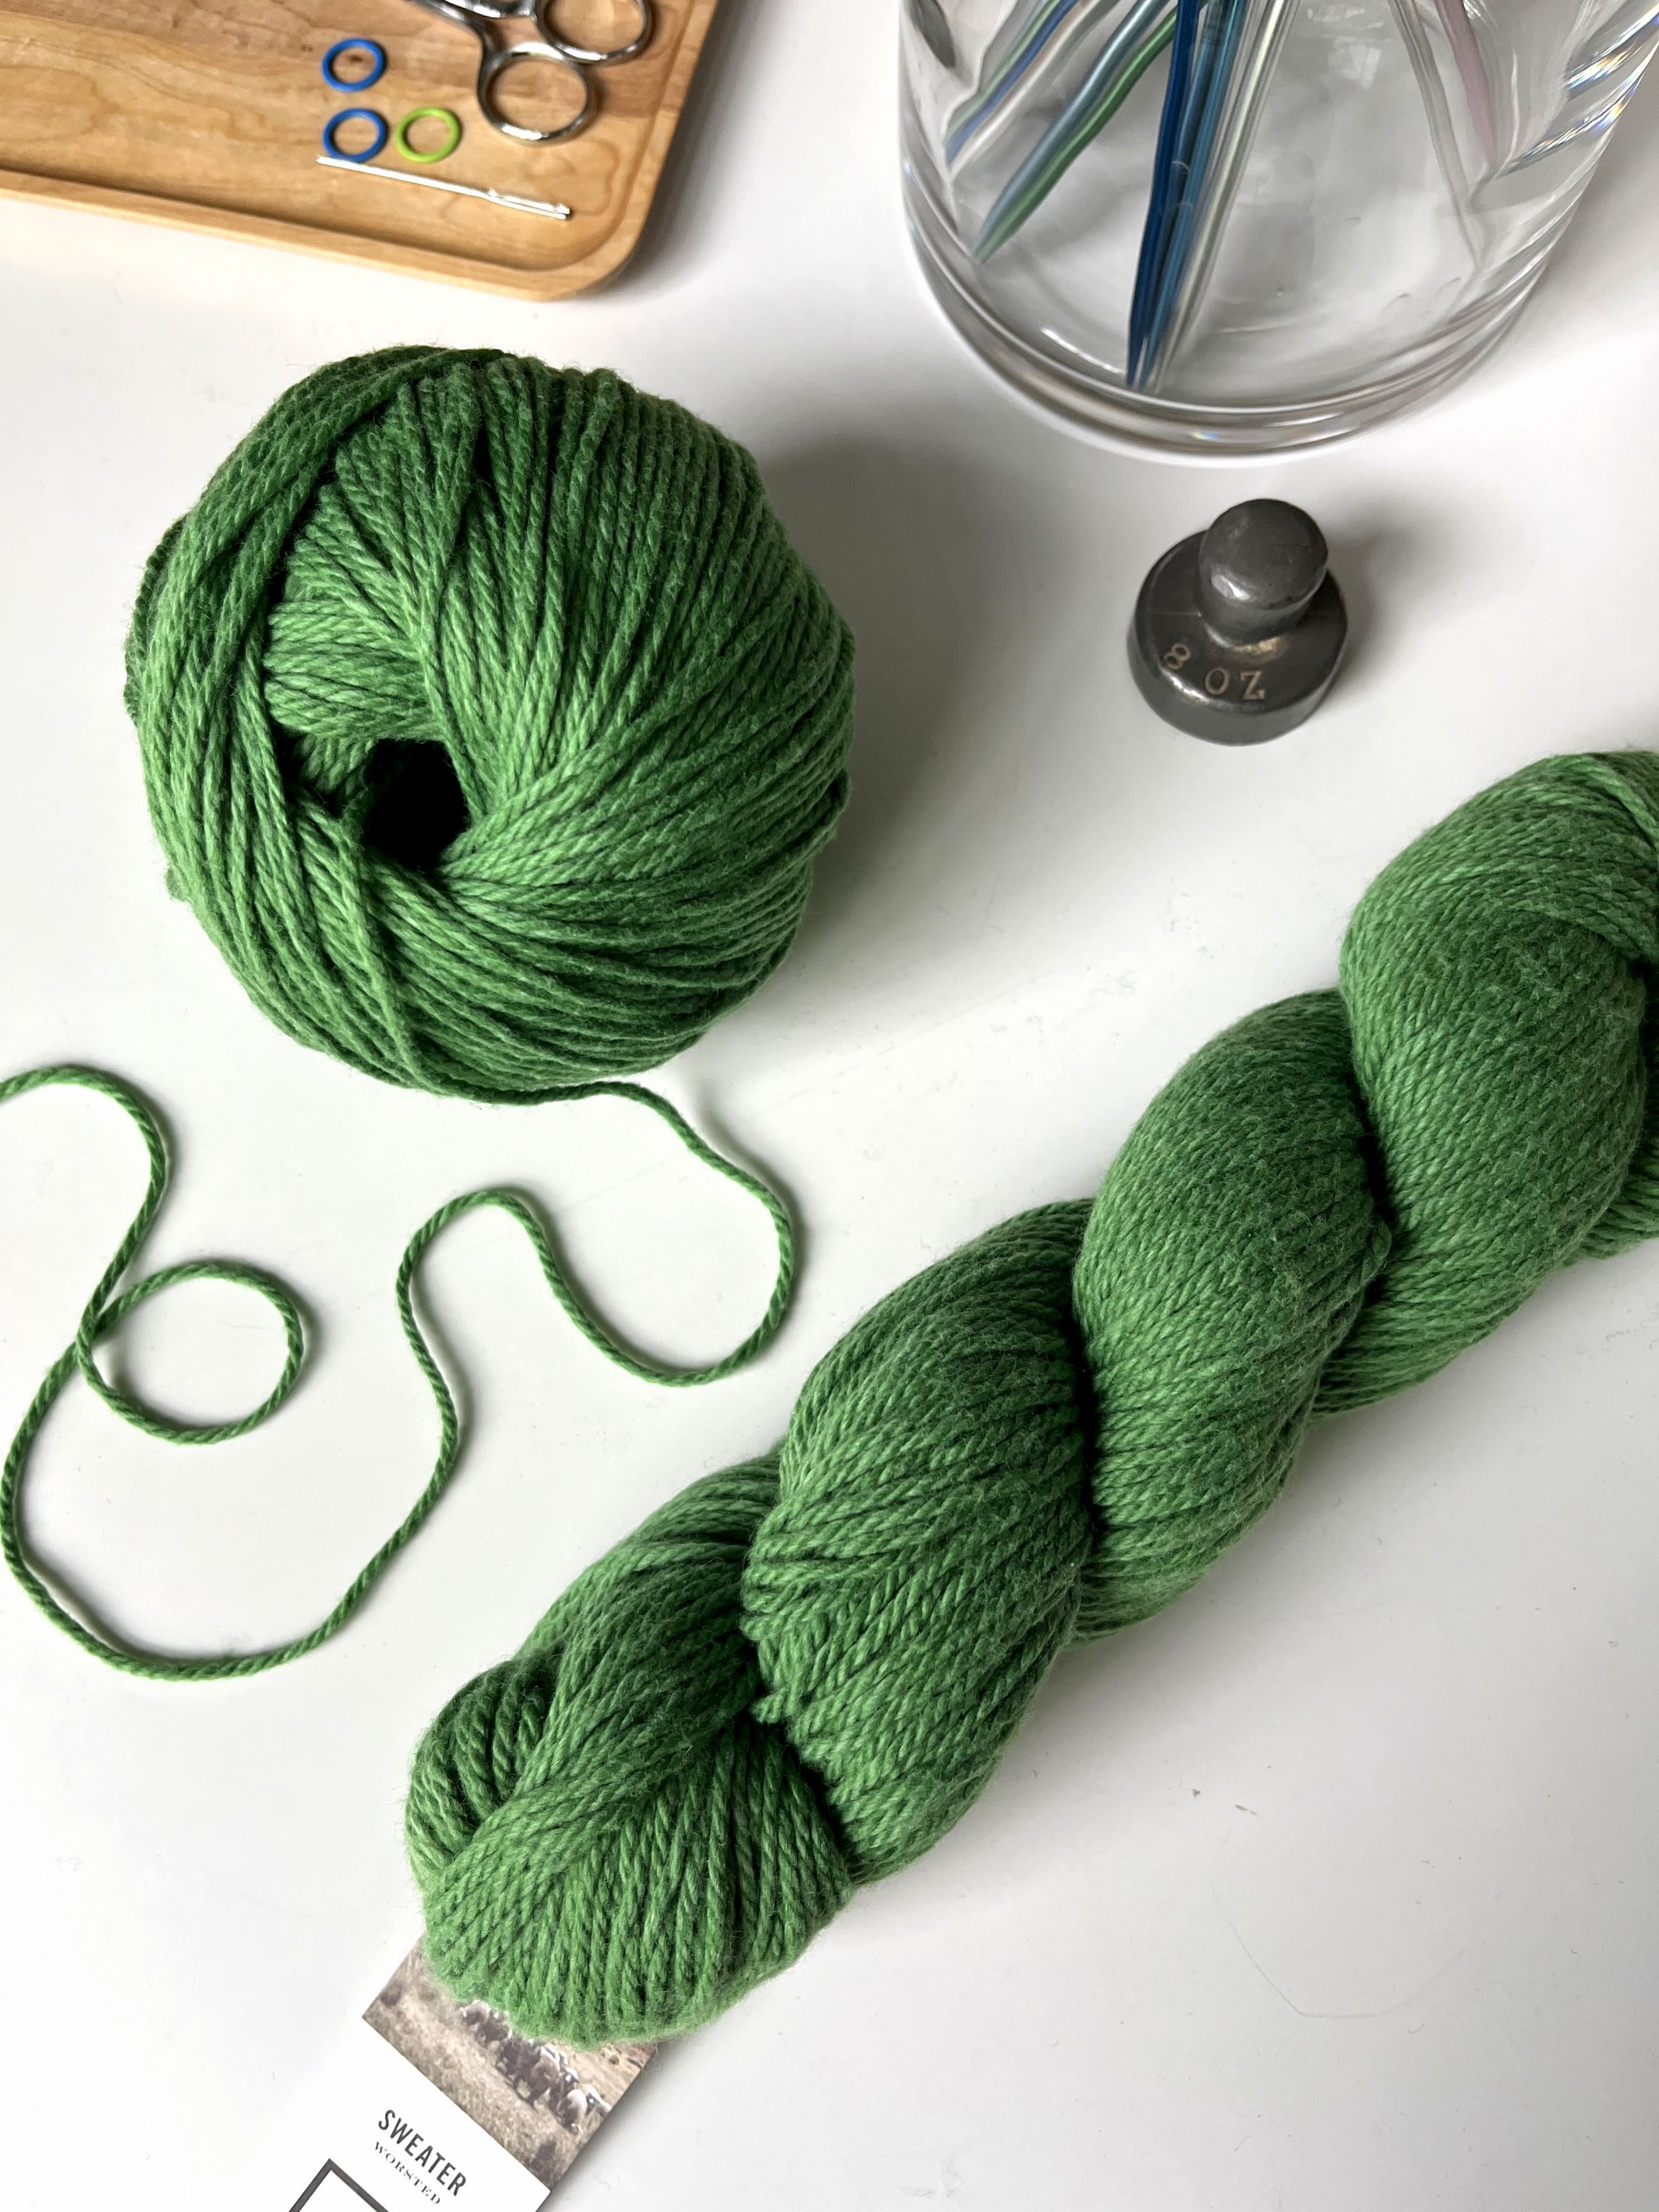
When I purchased skeins of Blue Sky Fibers Sweater yarn in the ‘Turtle’ colorway I hand wound each skein into a center pull ball (upper left).
WHAT IS A SKEIN OF YARN? WHAT IS A CENTER PULL BALL OF YARN?
First, it’s essential to understand the terminology!
SKEIN OF YARN: A skein of yarn is a description for one packaged and bundled quantity of yarn. (The word ‘hank’ is often used interchangeably with ‘skein’.) The yardage, meters or grams of yarn included in one skein varies from one yarn to another. Yarn sold in a twisted skein must wound into a ball or “yarn cake” before starting a project. Do not try to knit or crochet using yarn in the skein format… it will inevitably get tangled and cause a lot of headaches!

Six skeins of Blue Sky Fibers Sweater yarn: 1 skein in ‘Igloo’ (white); 3 in ‘Sea Horse’ (light blue); and 2 skeins in ‘Pollen’ (orange). I used the ‘Sea Horse’ yarn for the Touch of Kindness blanket knitting pattern.
PULL SKEIN OF YARN: Some yarns are sold in a “pull skein” format and do not have to be wound into a ball. The manufacturer packages the yarn in a format that is ready to use. Reach your fingers into the end of the skein of yarn and carefully locate the end of the yarn in the center of the skein. It can sometimes be a bit tricky to get the end pulled out cleanly! There are some helpful tips on LionBrand.com about using their pull skeins of yarn.
The photo below shows an example of a pull skein of yarn - Lion Brand Hue & Me bulky #5 weight yarn.
I used five colorways of Lion Brand Hue & Me bulky #5 weight yarn for the Here & Now Blanket knitting pattern. These colorways are ‘Marine’, ‘Toast’, ‘Smoke’, ‘Salt’, and ‘Whisper’. See the full selection of colorways for Hue & Me bulky yarn on the Lion Brand website.
BALL OF YARN: A ball of yarn is simply a way of winding yarn into a round ‘ball’ shape by wrapping the yarn around and around itself. When working a knitting project from a simple ball of yarn, the working end of the yarn is pulled from the outside of the ball. The disadvantage of this technique is the ball of yarn can easily roll away when working on a knitting or crochet project. The photo below shows a simple ball of yarn.
Be sure to see step-by-step tips below for hand winding a “center pull” ball of yarn! The center pull technique makes the yarn easier to use.
This photo shows my Touch of Kindness blanket knitting pattern in the works using Blue Sky Fibers Sweater yarn in the ‘Sea Horse’ colorway.
CENTER PULL BALL OF YARN: A center pull ball of yarn is a way of winding yarn so that the yarn can be easily pulled from the center of the ball. Some yarns are sold in a center pull format so it’s easy to start knitting or crocheting a project without the extra step of winding the yarn. It’s also easy to wind a skein of yarn into a center pull ball using your hands.
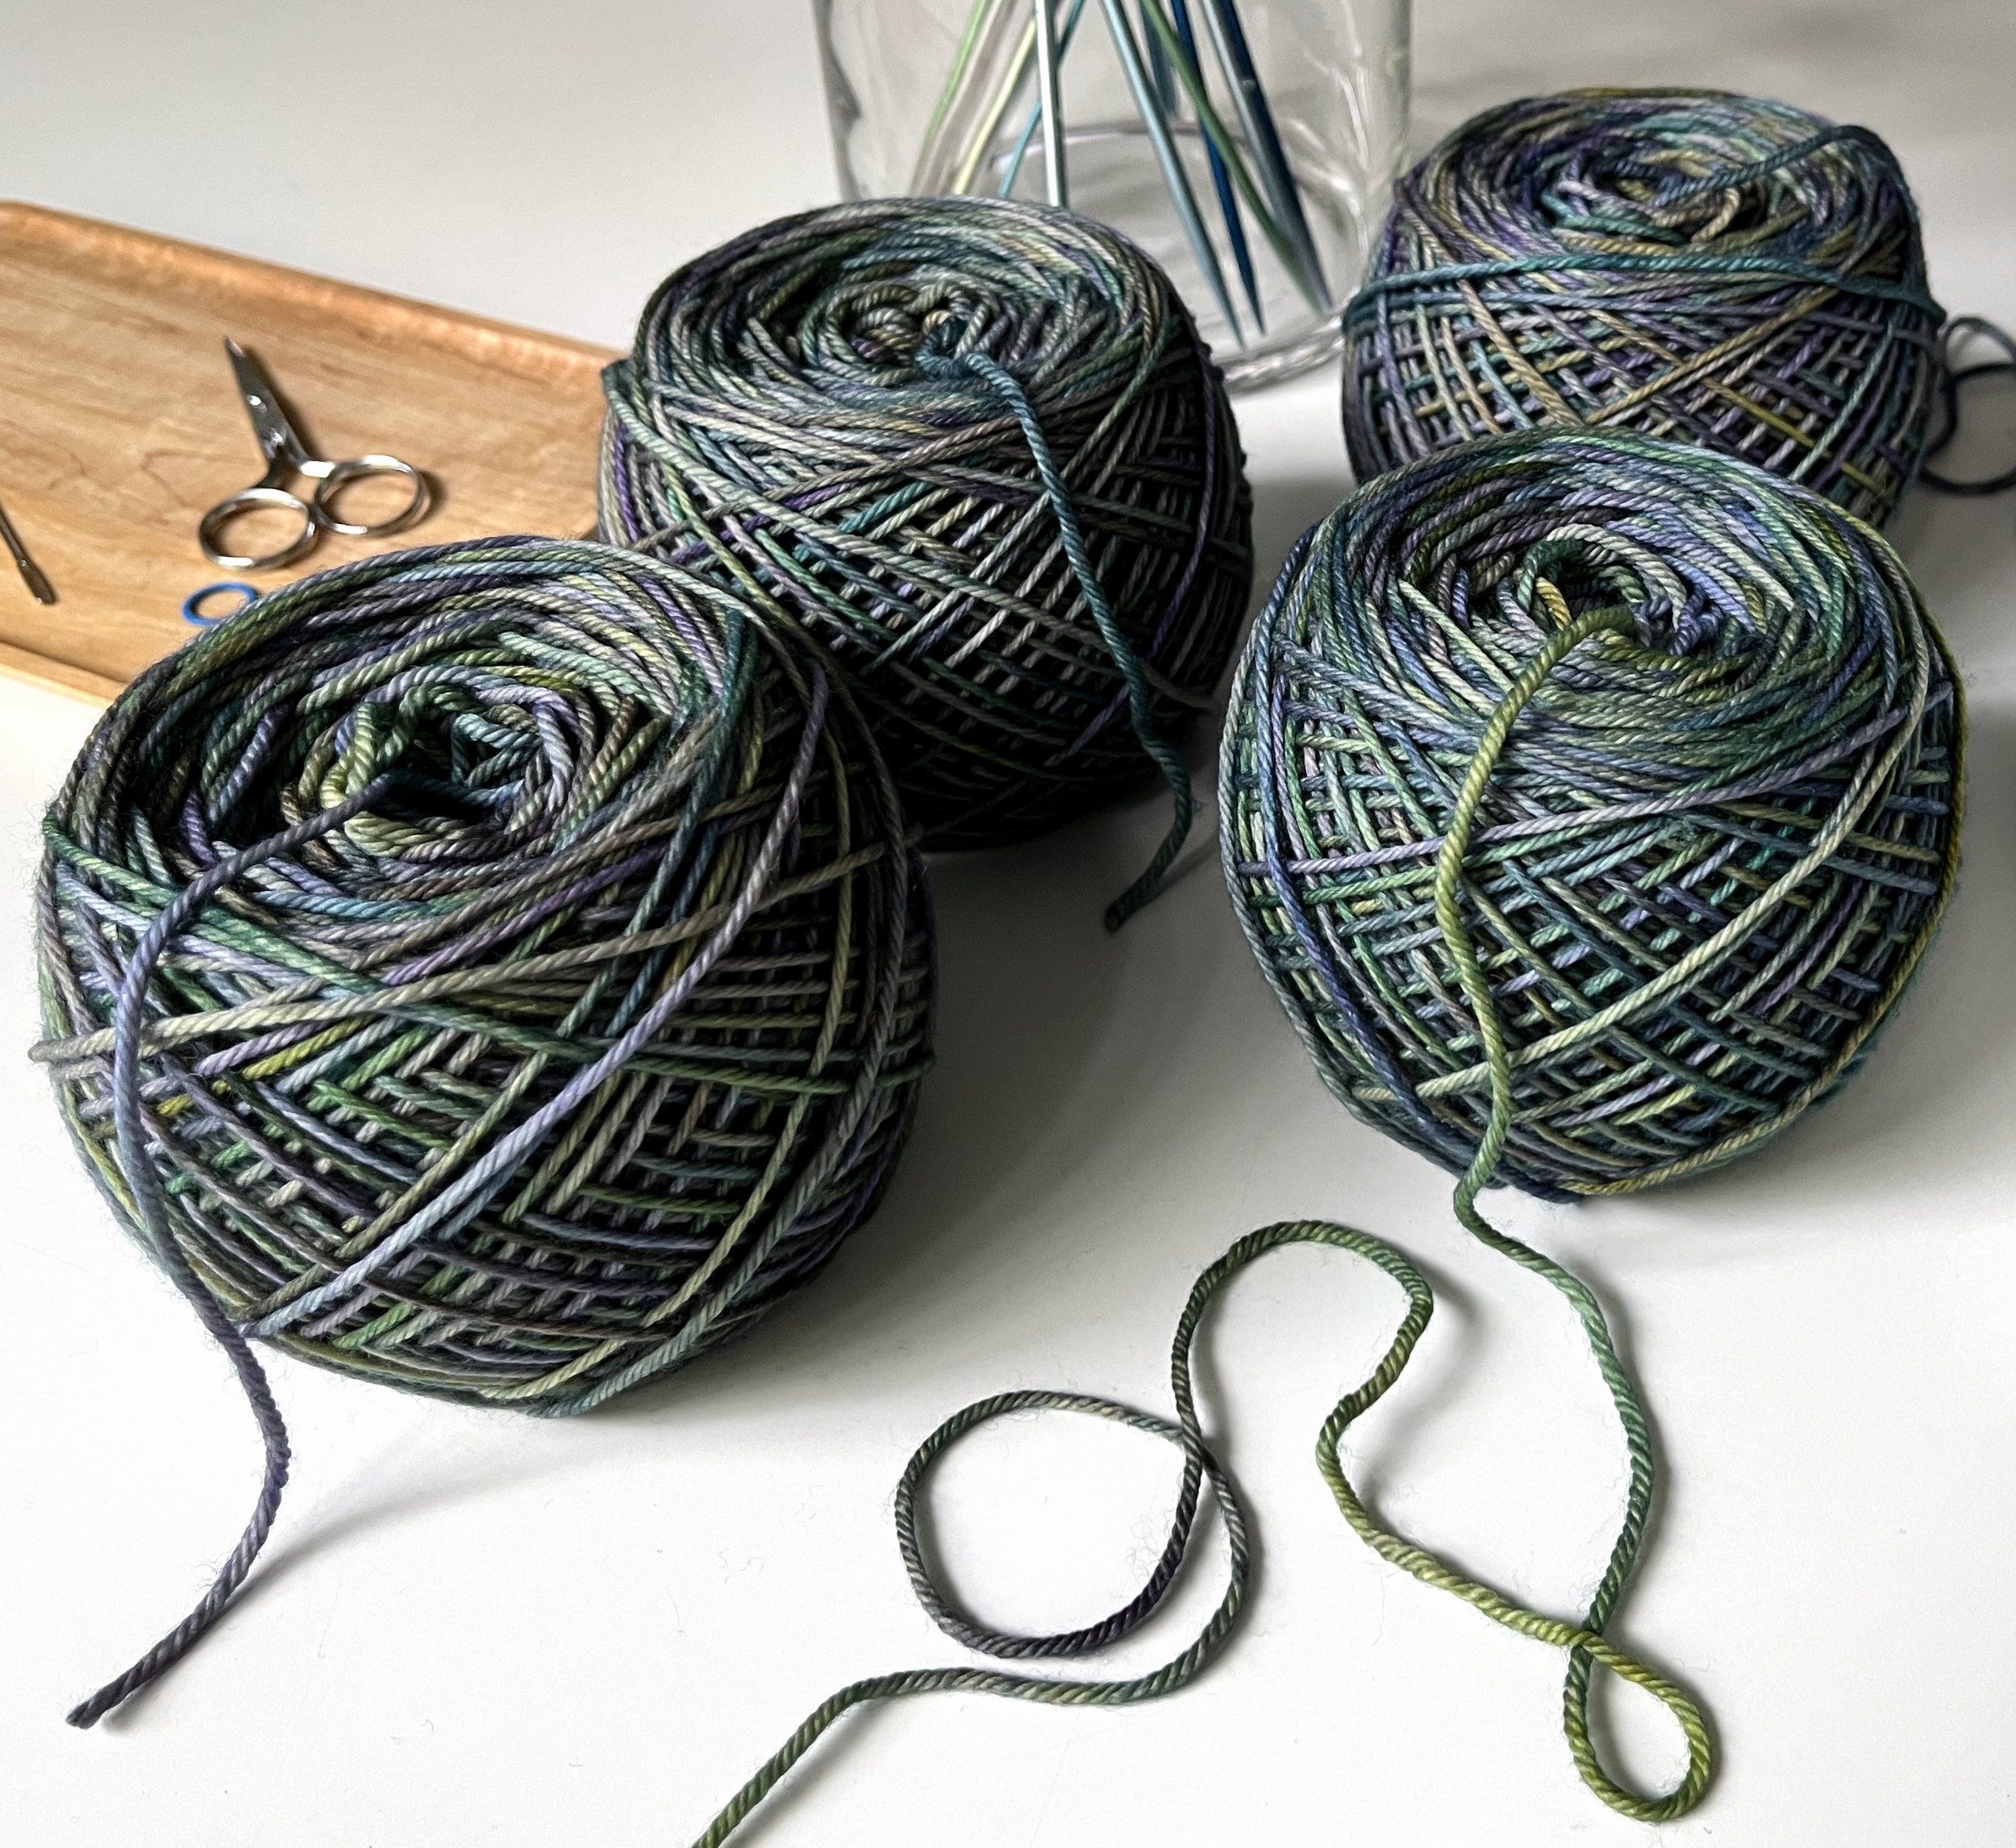
The yarns in the basket in the photo below were hand wound into center pull balls for my temperature blanket knitting project. It’s convenient to pull the yarn from the donut hole looking center when knitting a project. Get all the step-by-step instructions to hand wind a center pull ball of yarn below!
For my temperature blanket knitting project, I hand wound these center pull balls of yarn. When working on my project, I pulled the yarn from the donut hole looking center. I kept the balls of yarn in this flat basket since I changed yarn colors frequently for this multi-color project. This yarn is Berroco Vintage worsted weight yarn. Get more details about the yarn colors in my blog post about the project.
YARN CAKE: A “yarn cake” is a nickname for yarn after it has been wound into a cylinder shape using a ball winder. Using a ball winder and a swift to wind a skein of yarn creates a neat, easy to use, center-pull “cake” shape with a flat top and bottom. (The name is not related to the color of the yarn!) Many local yarn shops will wind purchased skeins of yarn into yarn cakes as a service for their customers.
Four skeins of Malabrigo Rios that were wound into neat “yarn cakes” using a ball winder. This yarn color is ‘Indiecita’.
SWIFT: A swift is a tool used to hold a skein (or hank) of yarn while it is being wound into a ball. The swift turns or rotates as the yarn is unwound. Most swifts are adjustable to hold the yarn securely and help prevent the yarn from getting tangled. A swift can be very helpful even when hand winding yarn. And, a swift is essential if using a ball winder (see below). There are two types of swifts: an umbrella swift (that expands in and out like an umbrella) and a tabletop swift with a wood base with two “X” bars and pegs that hold the yarn. SHOP: Shop for various options from The Woolery, Knit Picks, Jimmy Beans Wool and Amazon.
BALL WINDER: A ball winder is a tool for winding yarn from a skein into a neat center pull ball or “yarn cake”. Ball winders are usually operated by hand by turning a handle. (There are also electric ball winders.) A ball winder will work best if used along with a swift to hold the yarn. SHOP: Some options for ball winders include Knitter’s Pride Wool Winder (Amazon) or Knitter’s Pride Natural Series Ball Winder (Amazon). There are also a number of other options available from Jimmy Beans Wool, The Woolery and Knit Picks.
Click here to see my collection of knitting patterns!
SUPPLIES NEEDED TO HAND WIND YARN INTO A CENTER PULL SKEIN:
A skein of yarn
Scissors
Something or someone to hold the skein of yarn such as: a swift, two dining chairs arranged back to back, your knees (to drape the yarn over), or a friend willing to hold the yarn across their two hands for about 10 minutes.
Your hands. Or, a simple ball winding tool.
HOW TO WIND A CENTER PULL BALL OF YARN:
Step by step instructions...
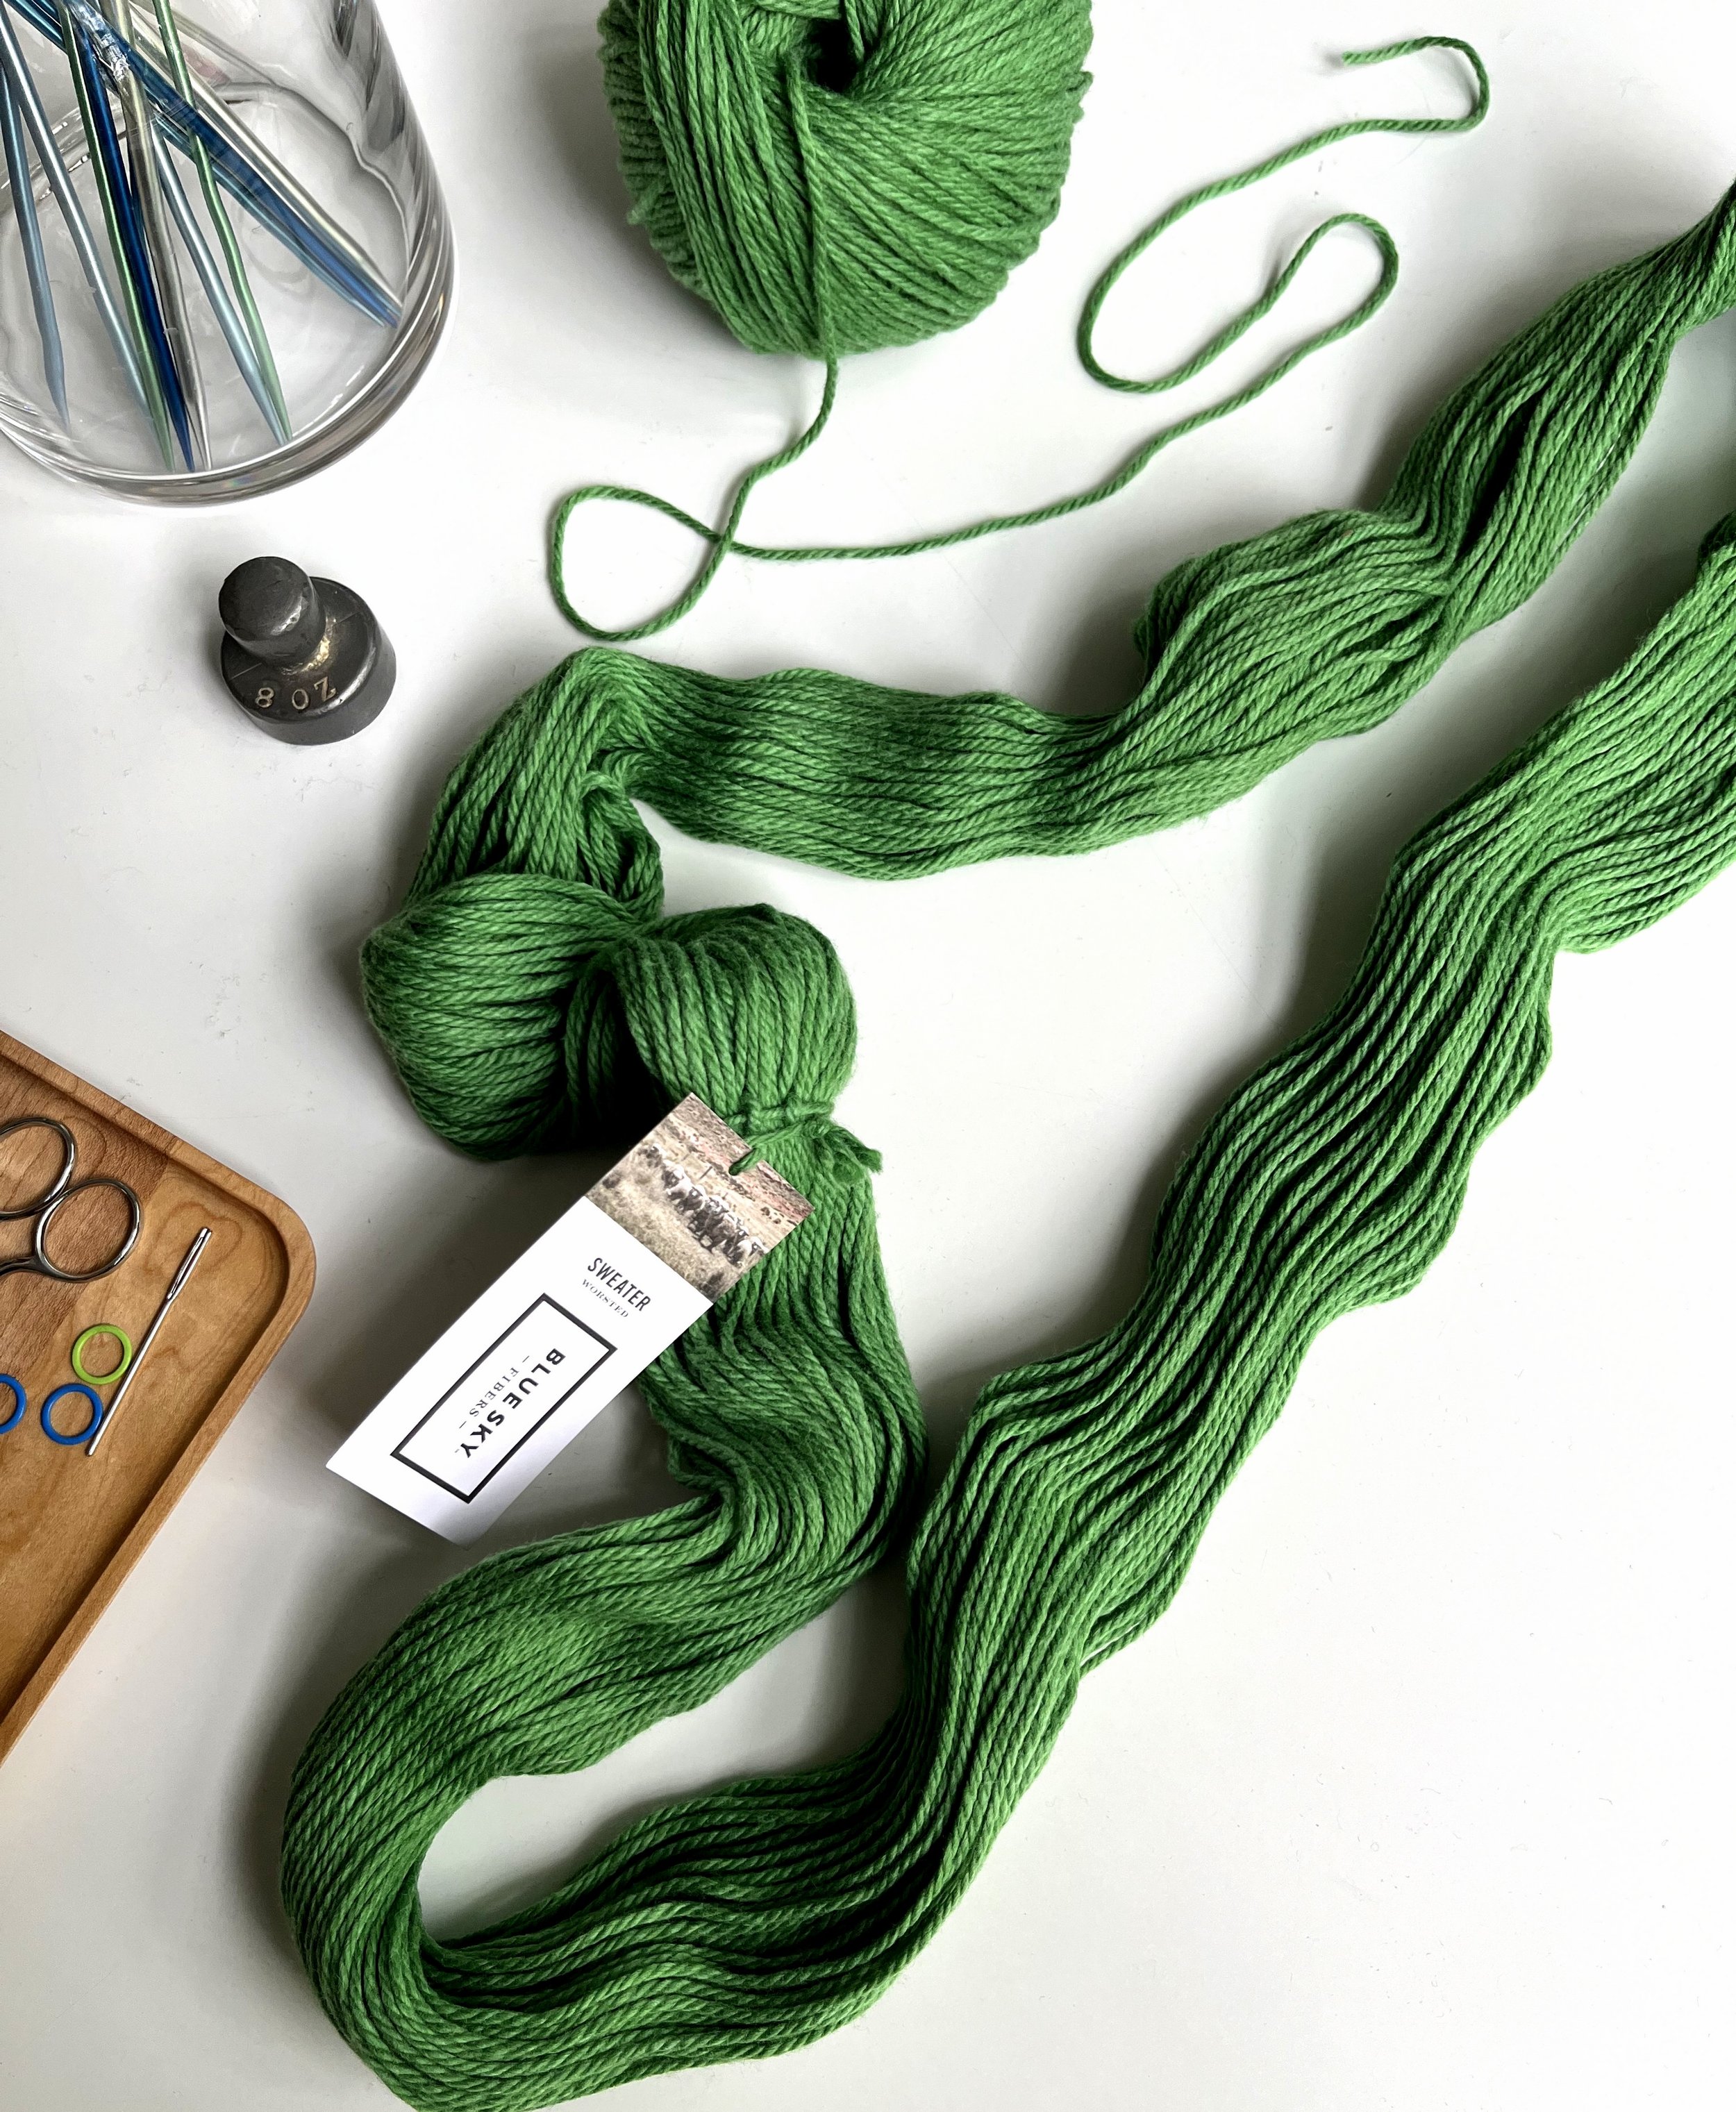
1. Untwist the skein of yarn. Be careful to keep the strands of yarn grouped and bundled together in the original continuous loop. Avoid twisting the loop of yarn. Keep all tied yarn in place! Do not cut the knot holding the yarns together.
2. If you have a swift, arrange the yarn neatly on the pegs or umbrella swift. See options from The Woolery, Knit Picks, Jimmy Beans Wool and Amazon.
My husband made this basic wood yarn swift for me. It’s simple to use and it’s easy to take apart for storage. A couple washers and a loosely tightened bolt in the center allow the wood bars to rotate as the yarn is pulled from the skein. Perhaps a future blog post will have more specific details on how to make it!
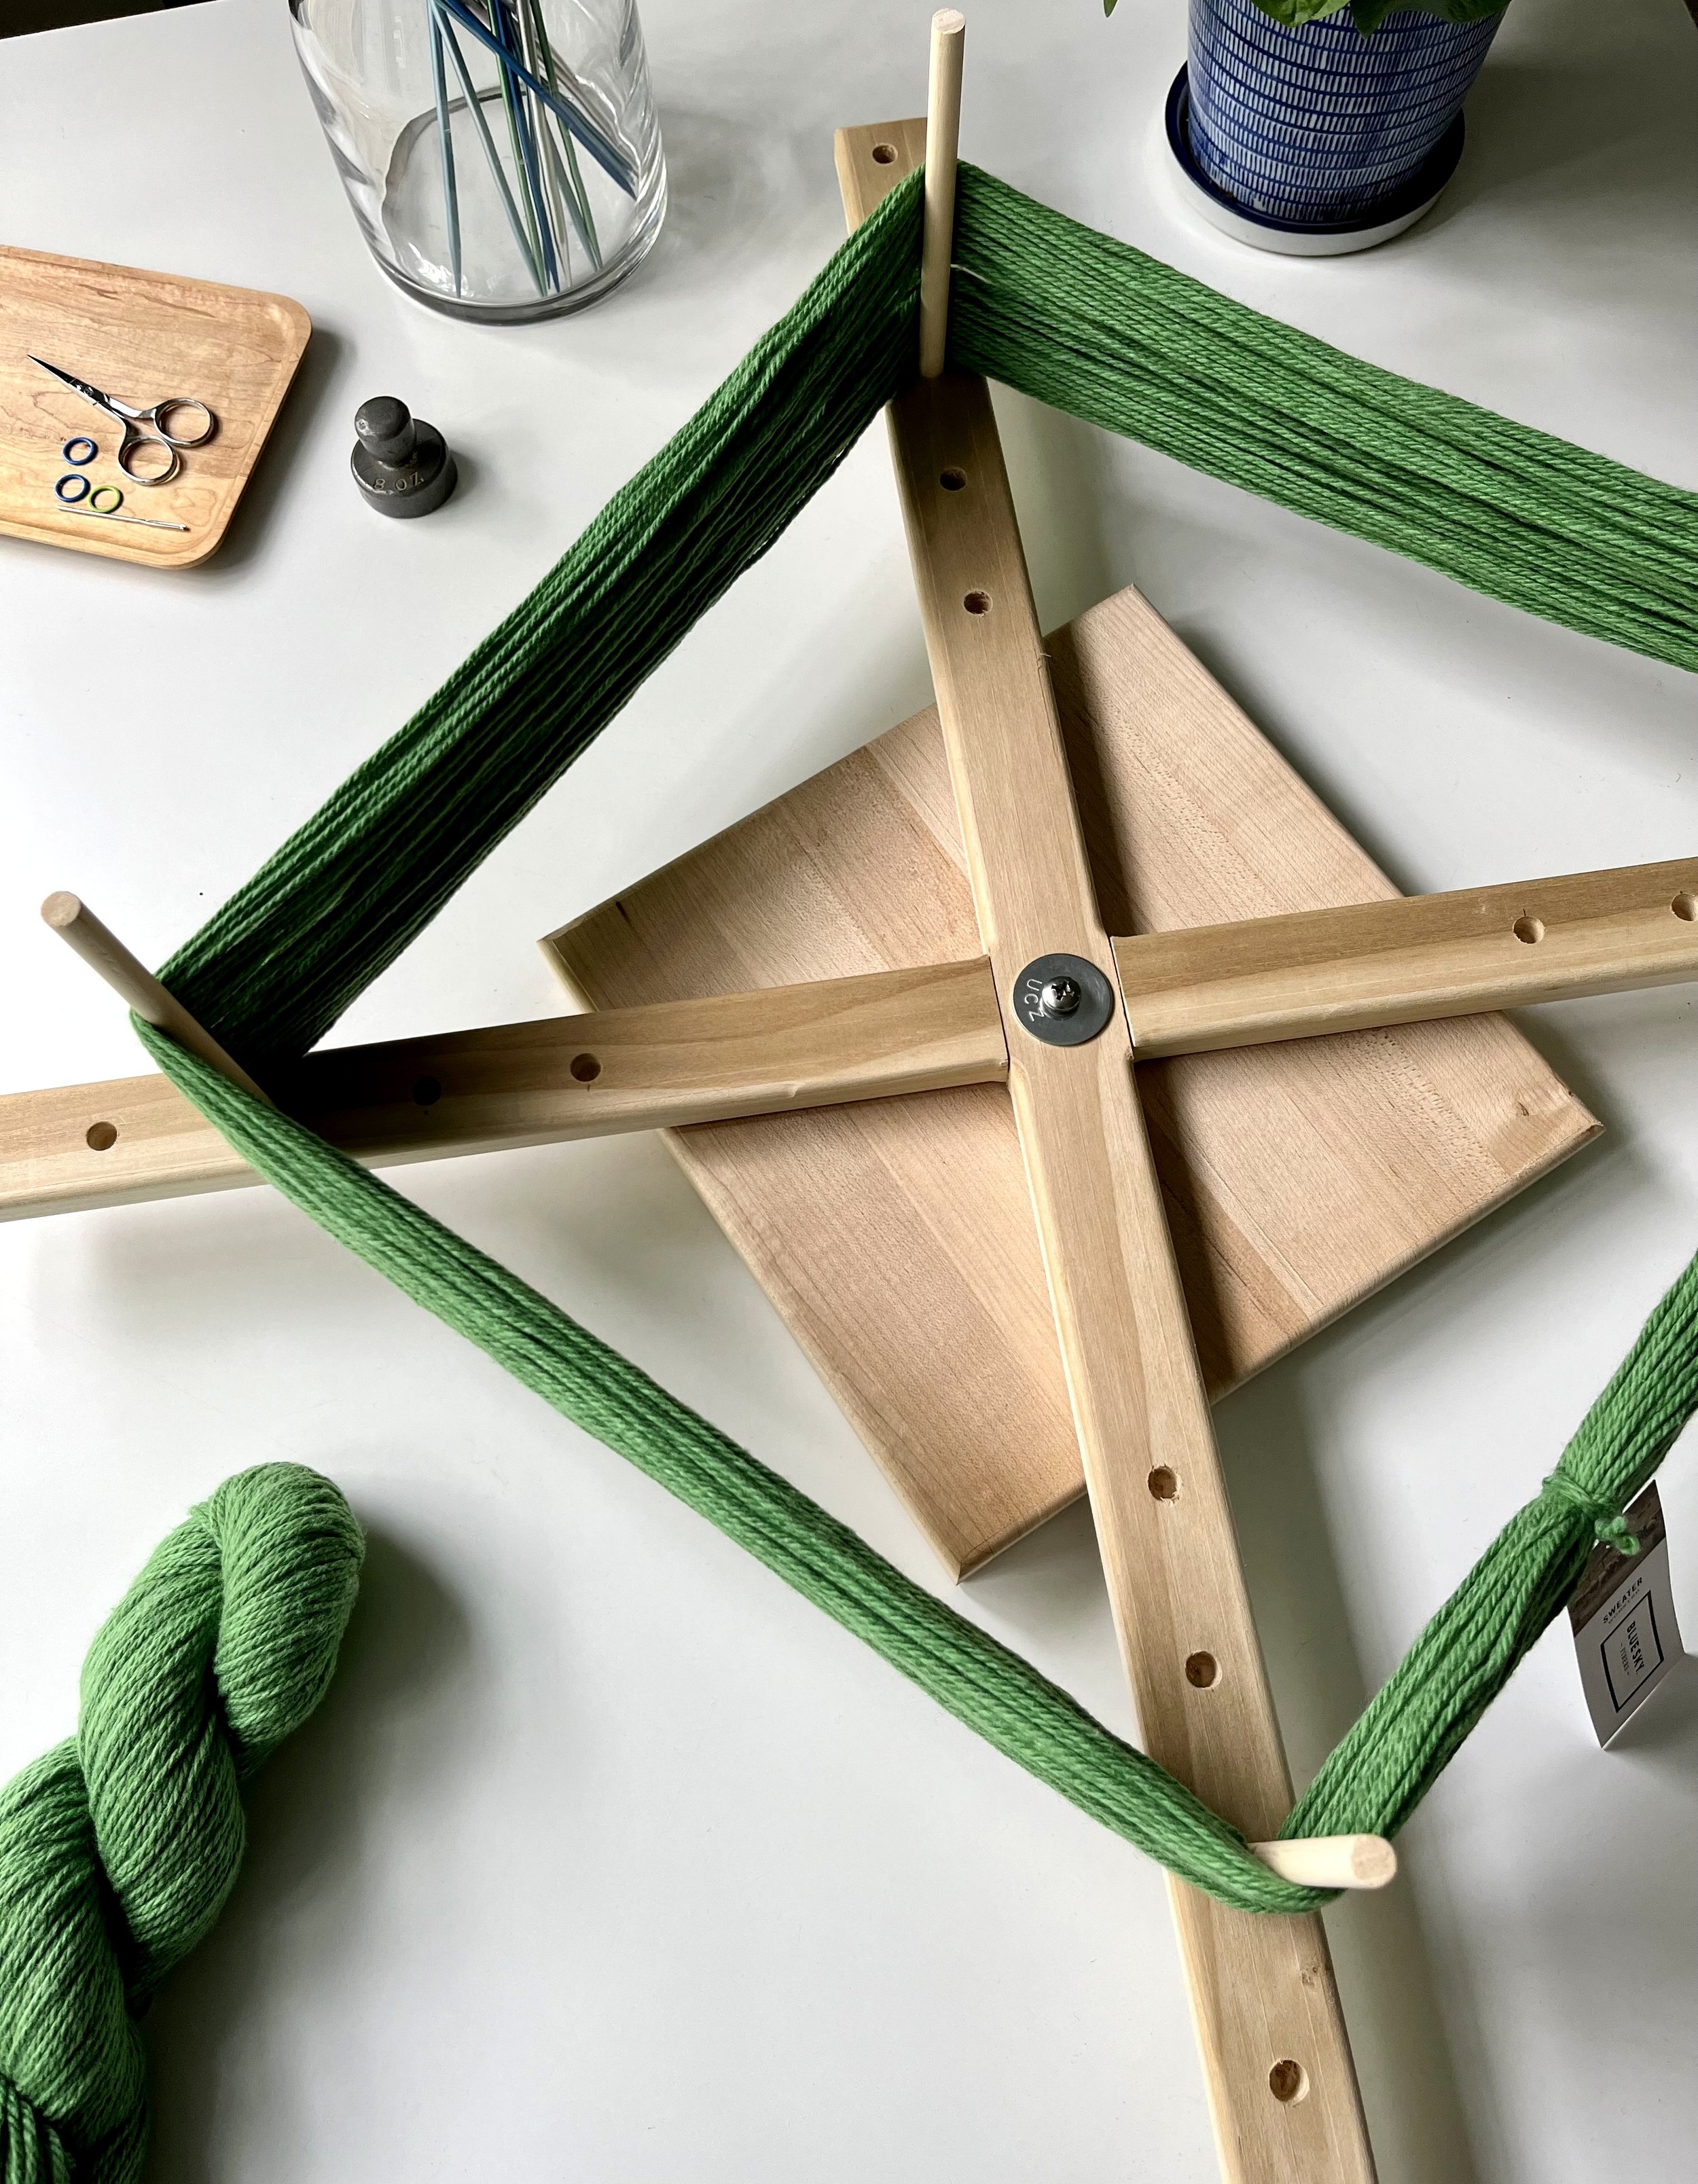
DIMENSIONS OF MY HOMEMADE WOOD YARN SWIFT: The base is a 1.25” thick piece of wood that is 10” x 10” square. The two long wood “bars” are each 29.5” long x 1.5” wide. They were cut to interlock in the center. The 6” long dowel pieces are 3/8” thick and can be moved to five different spots. This makes it easy to adapt to the length of various skeins of yarn. The five dowel holes are spaced 2” apart.
3. Use scissors to cut the knot joining the two ends of the yarn. And, cut off the yarn label. Save the yarn label for future reference. Sometimes, there are other scrap pieces of yarn holding the skein together. Cut those off (being careful not to cut any yarn on the skein) and discard.
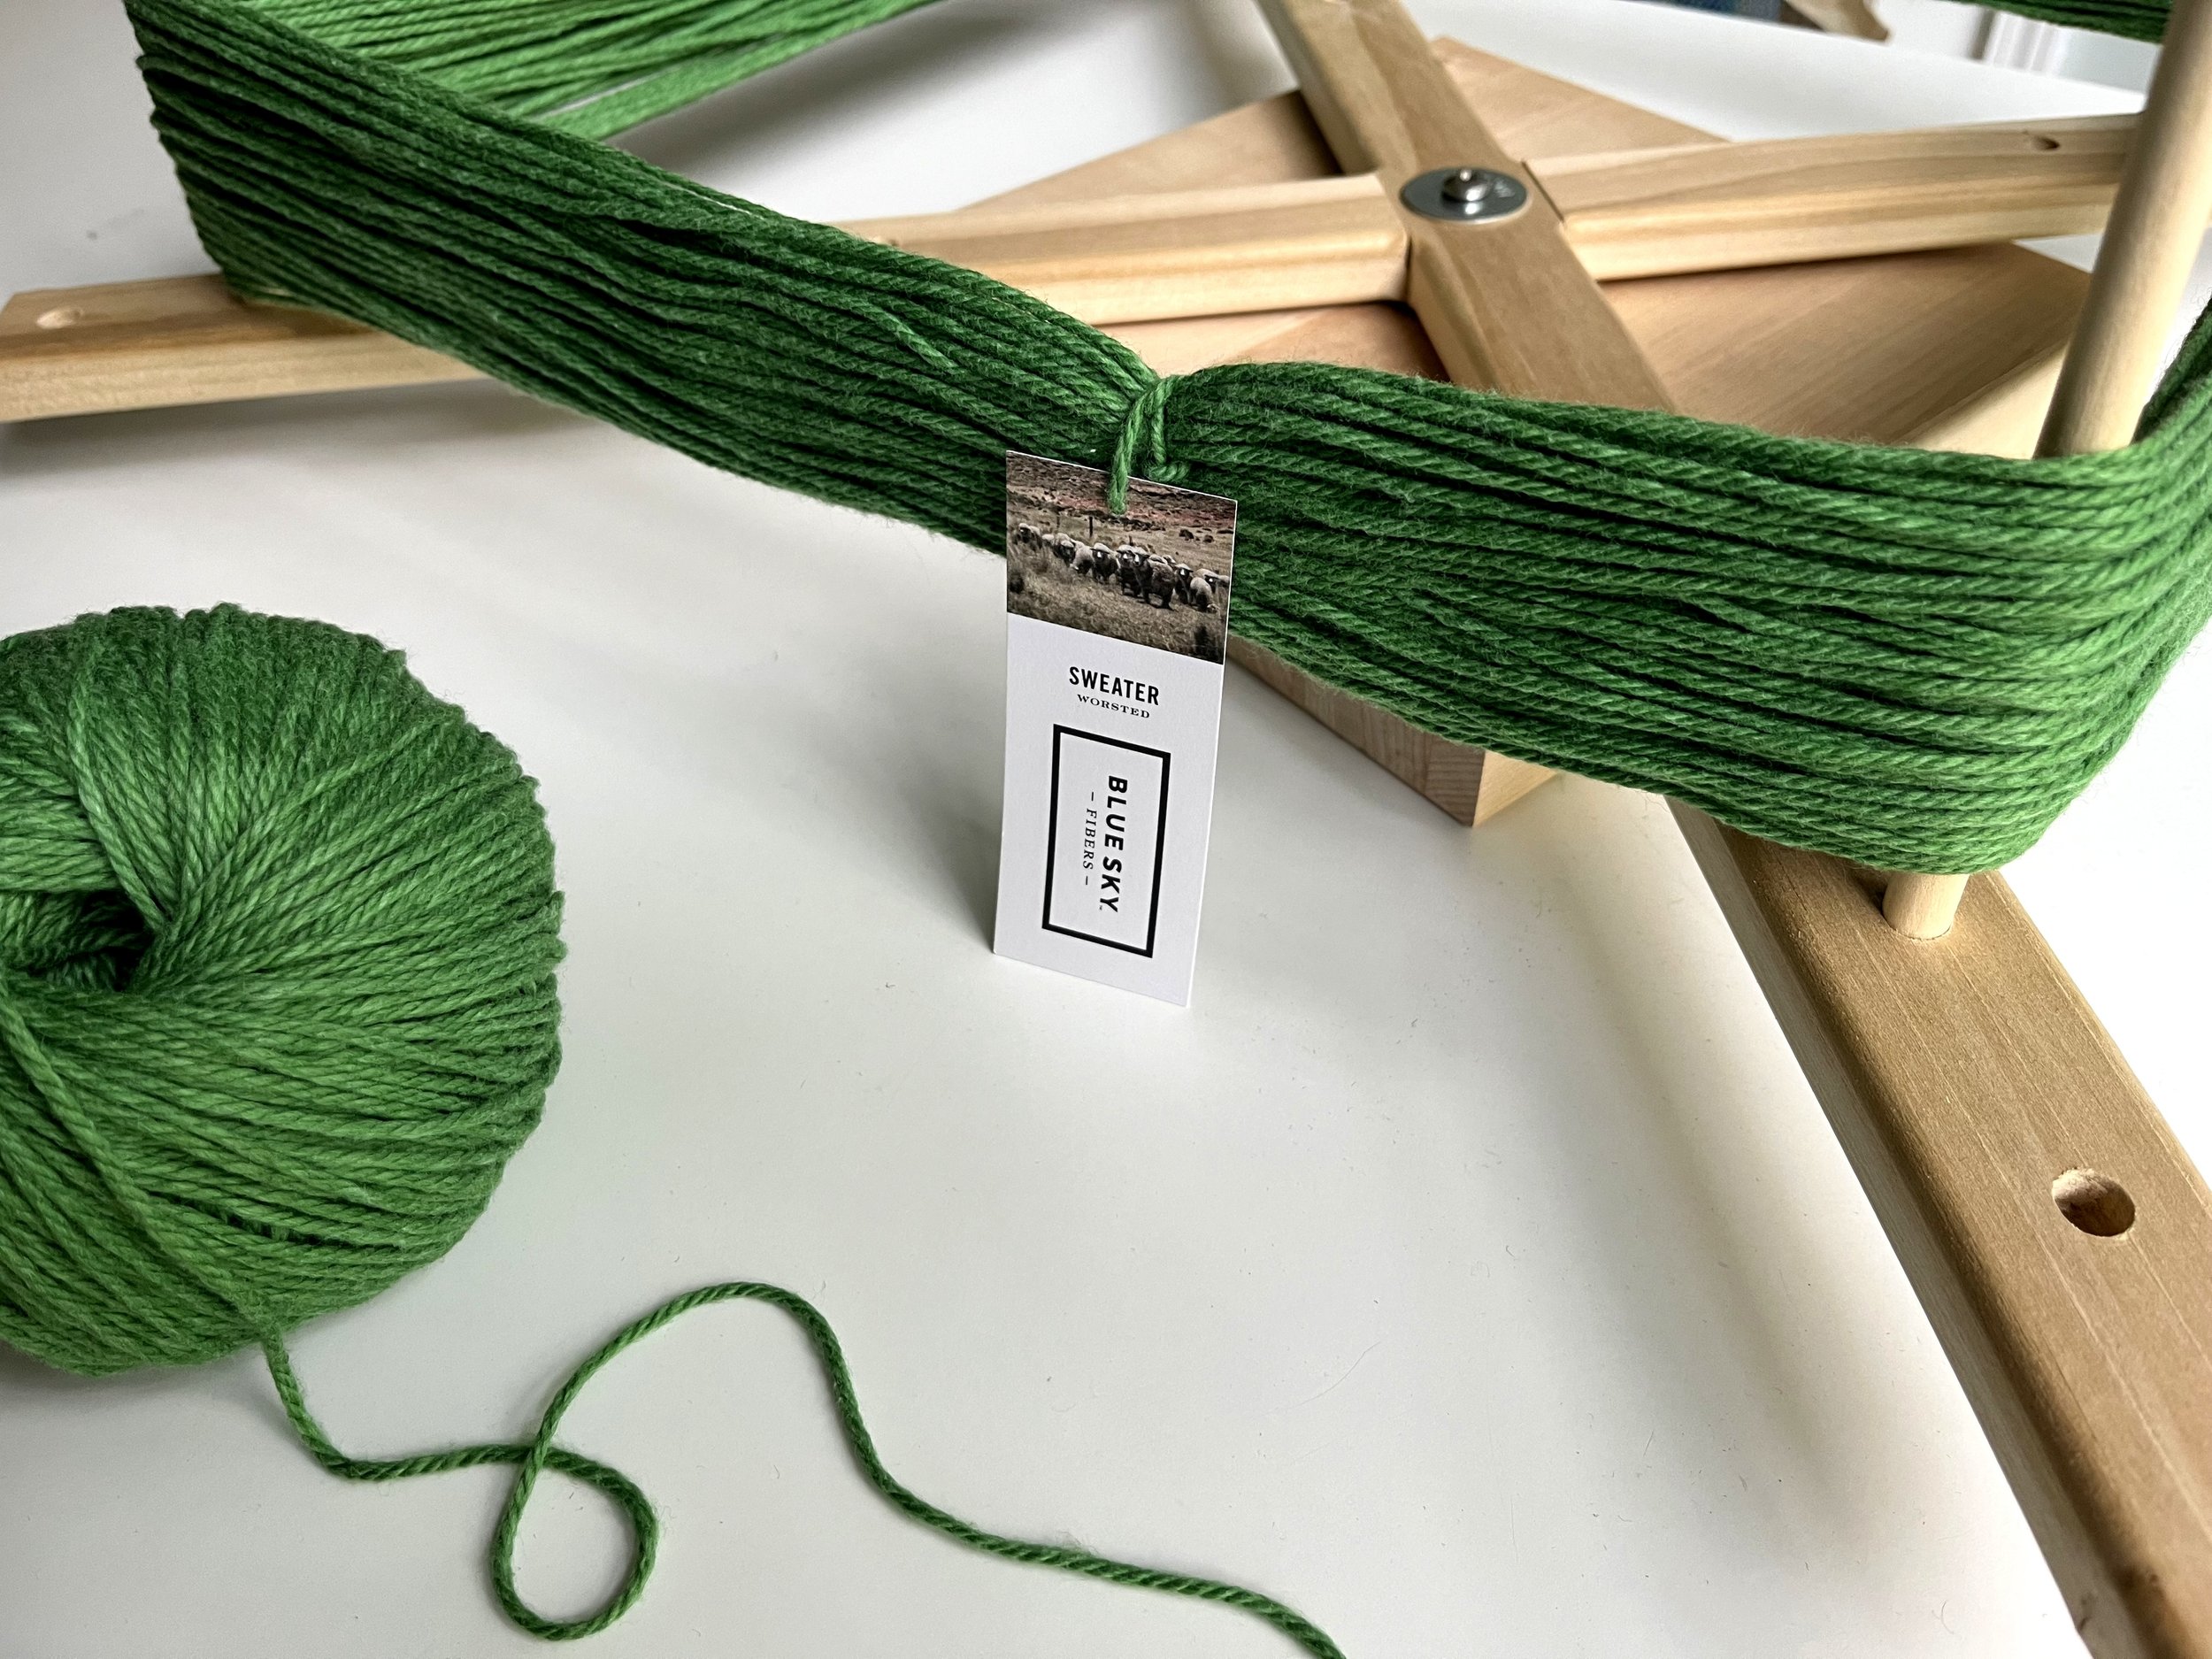
4. There should now be two loose ends of yarn. Secure the piece of yarn that is on the inner part of the skein to a peg on the swift or to a piece of the umbrella style swift. A couple wraps is enough to keep it in place.
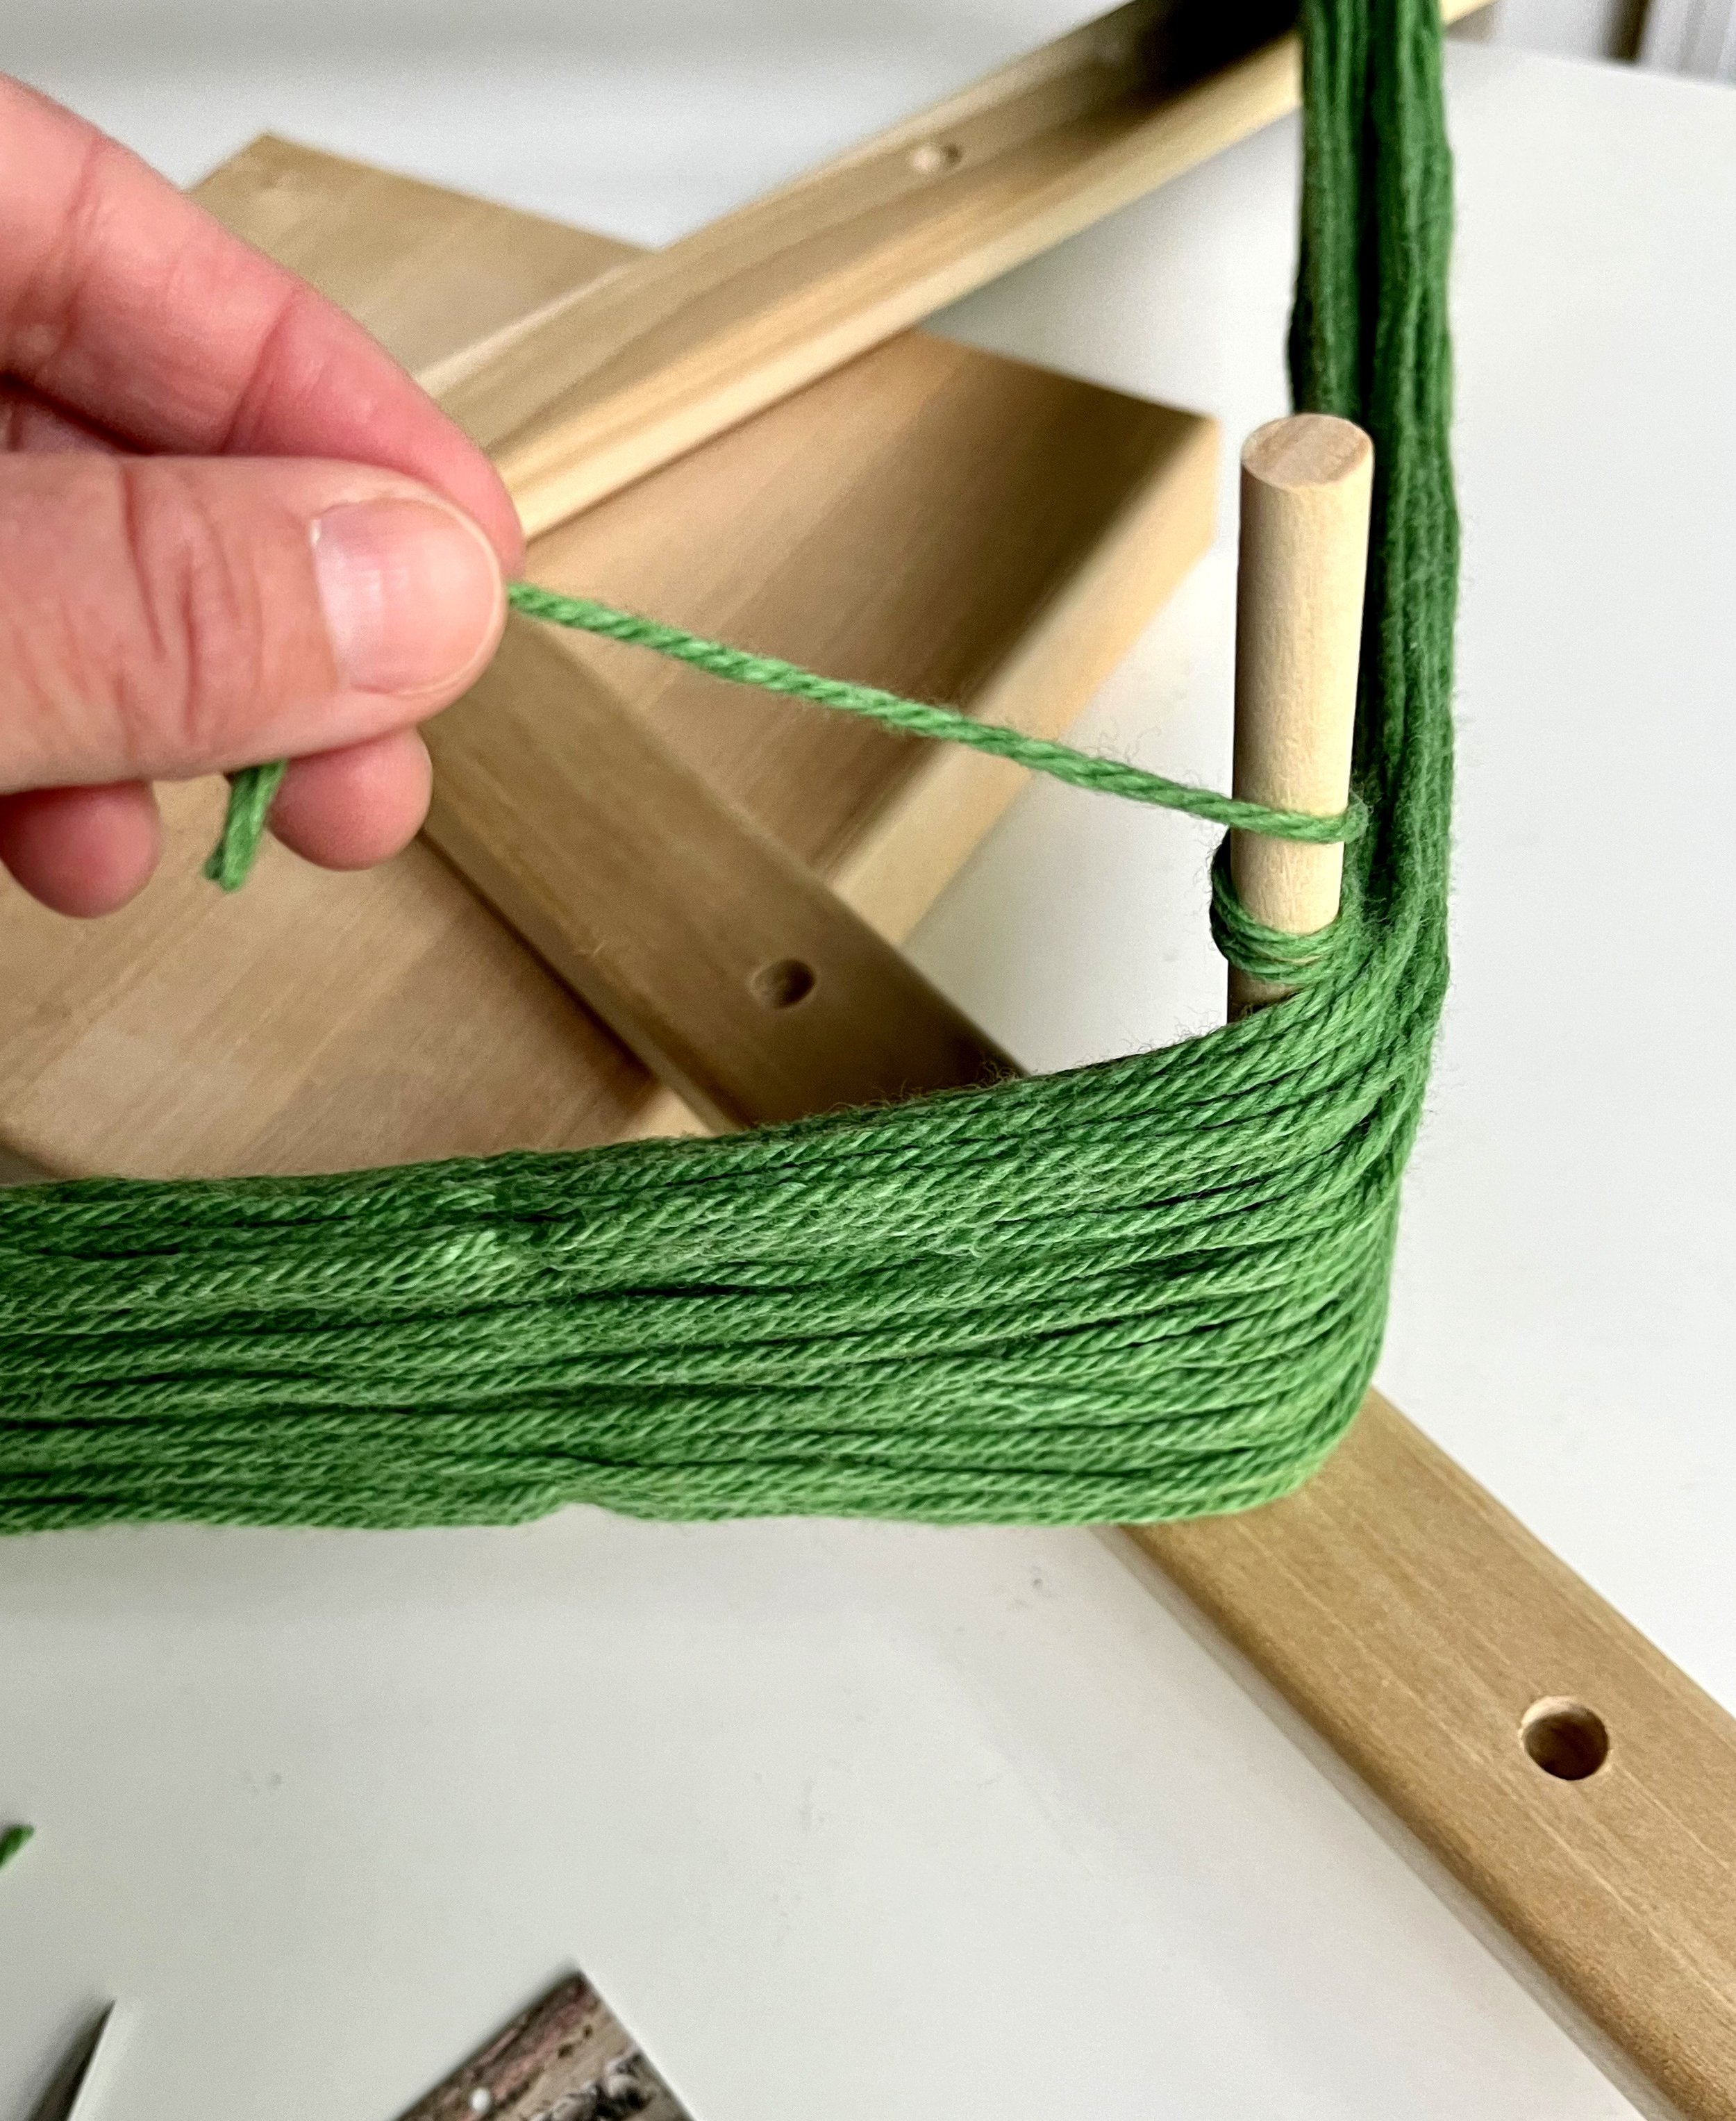
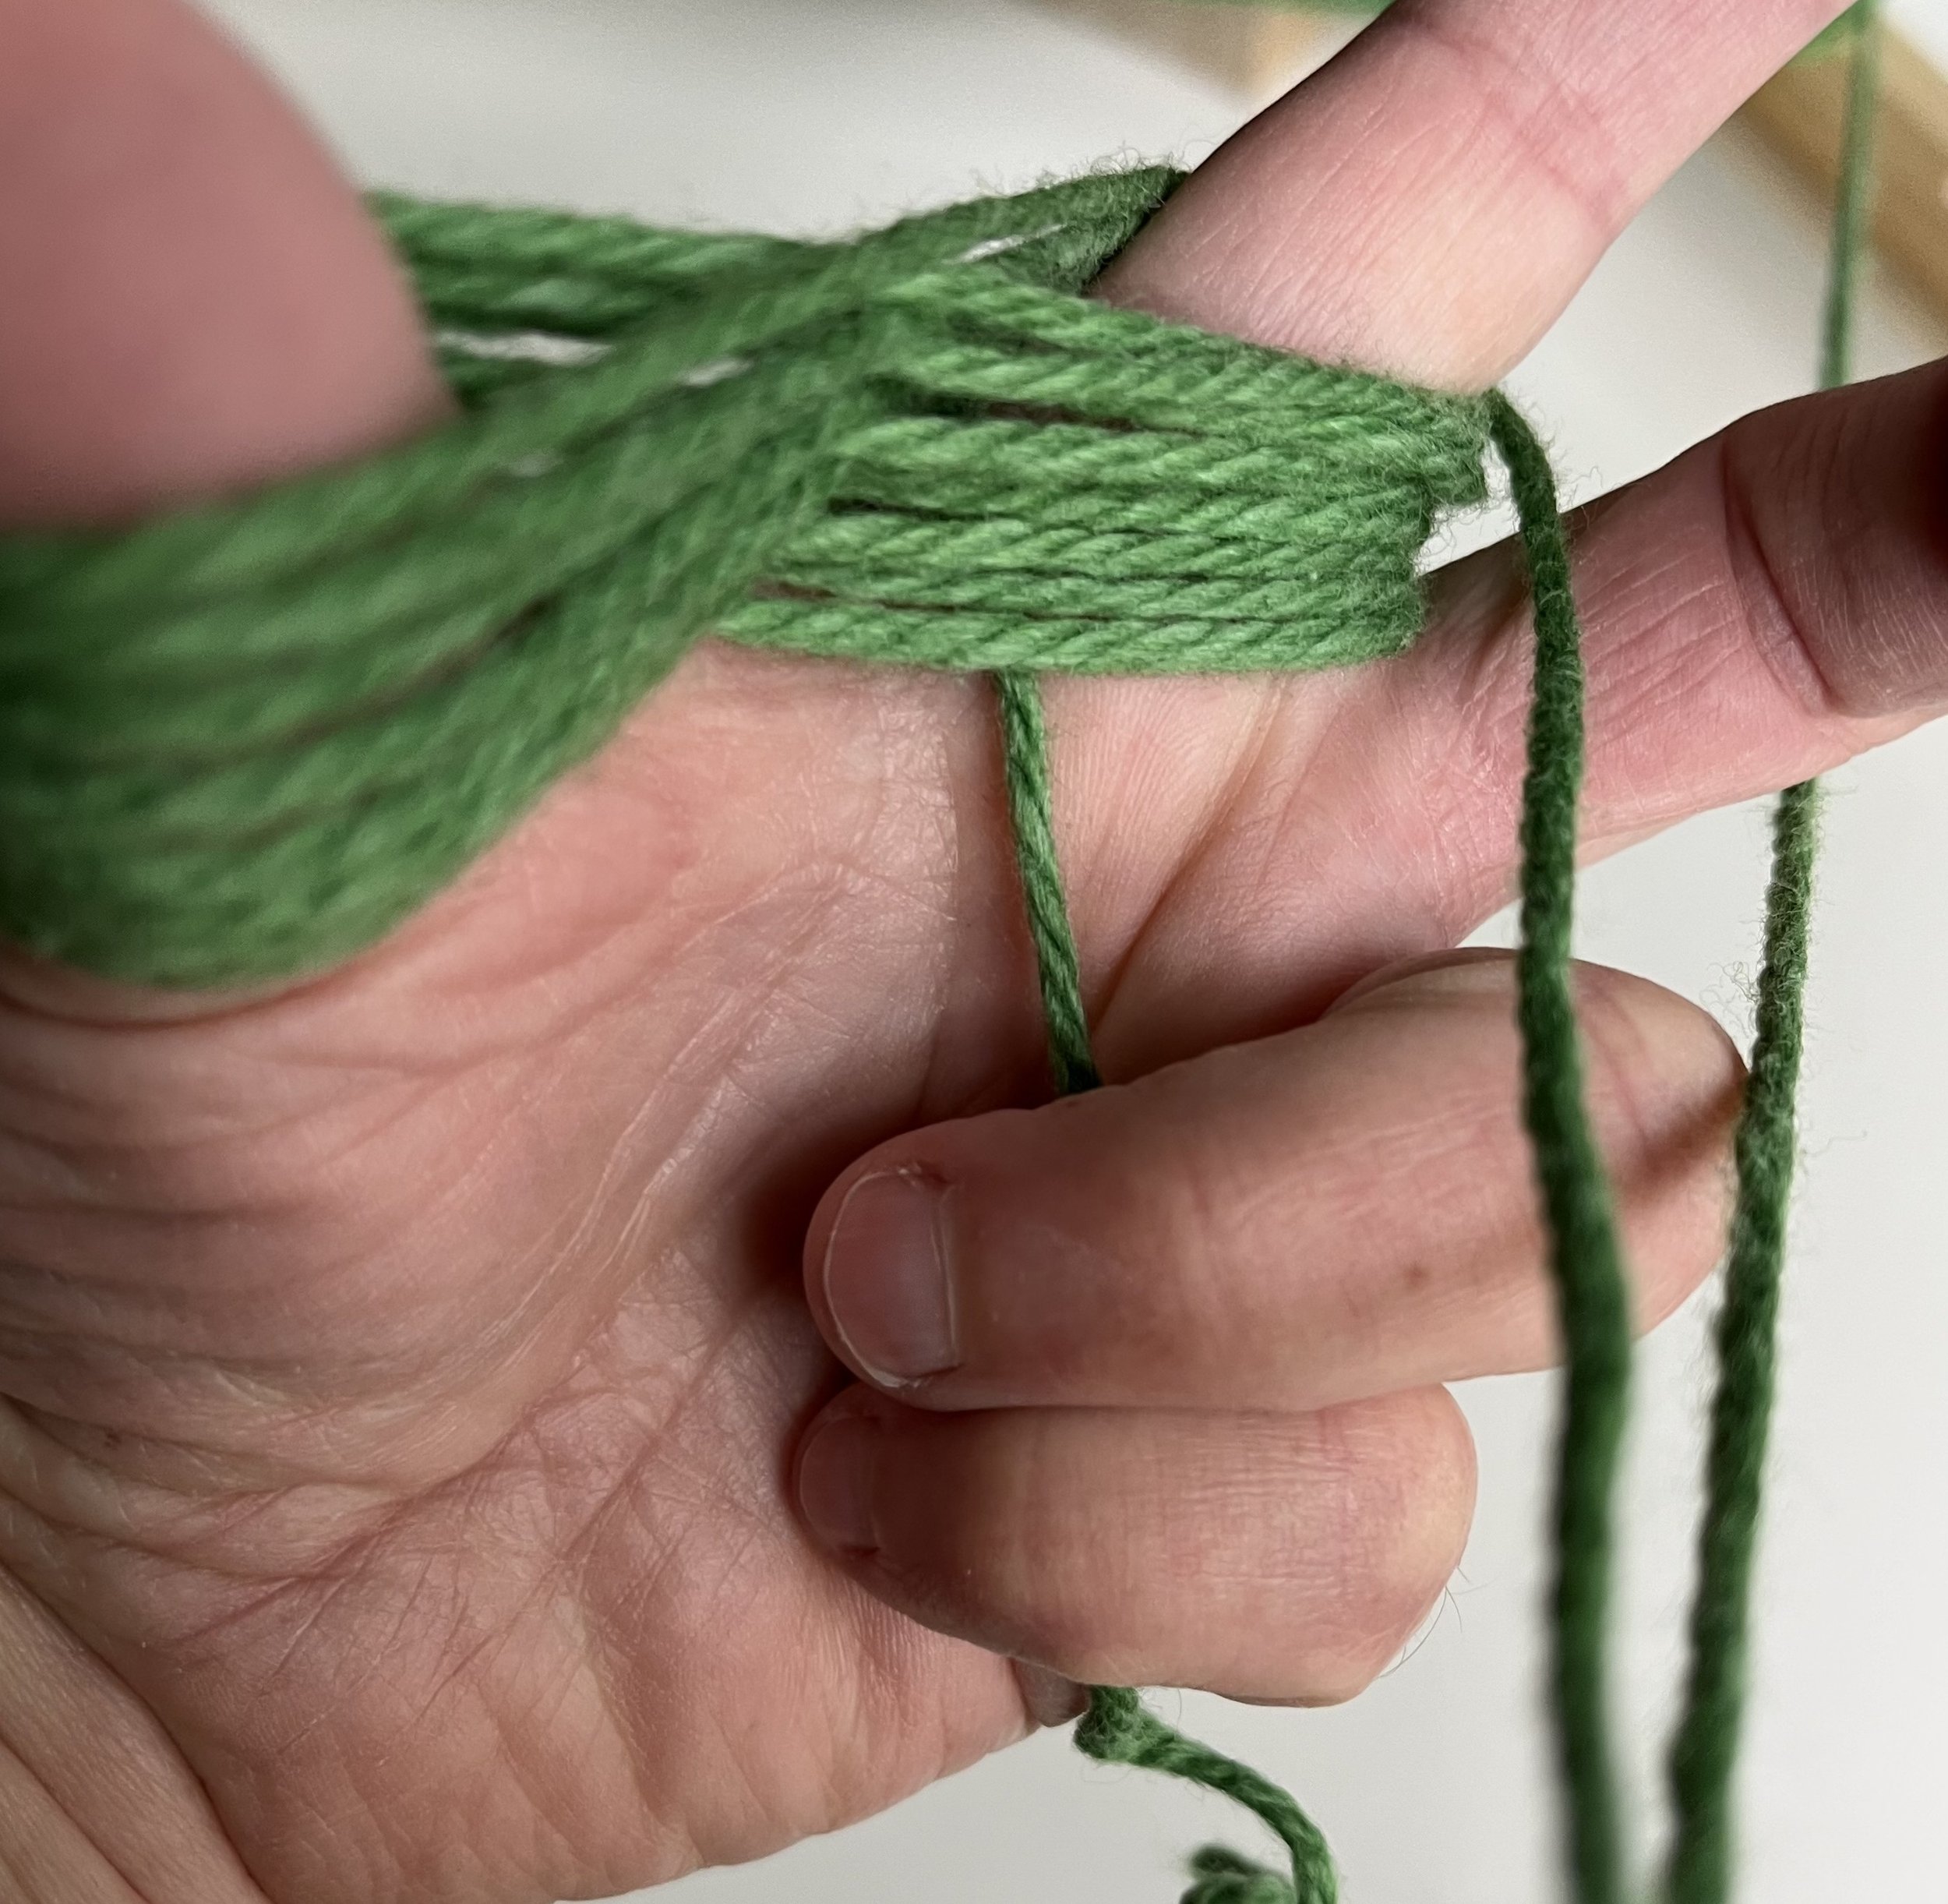
5. Pick up the end of the yarn on the outer edge of the skein. Place the end of the yarn over the palm of your hand (end down) and lightly grip the end with your fingers. (I’m right handed and use my left hand to hold the yarn.) Then, start by wrapping the yarn around your pointer finger clockwise… and then around your thumb counterclockwise… making a “figure 8”.

6. Continue wrapping the yarn around your pointer finger and thumb in a “figure 8” that crisscrosses between the two fingers.
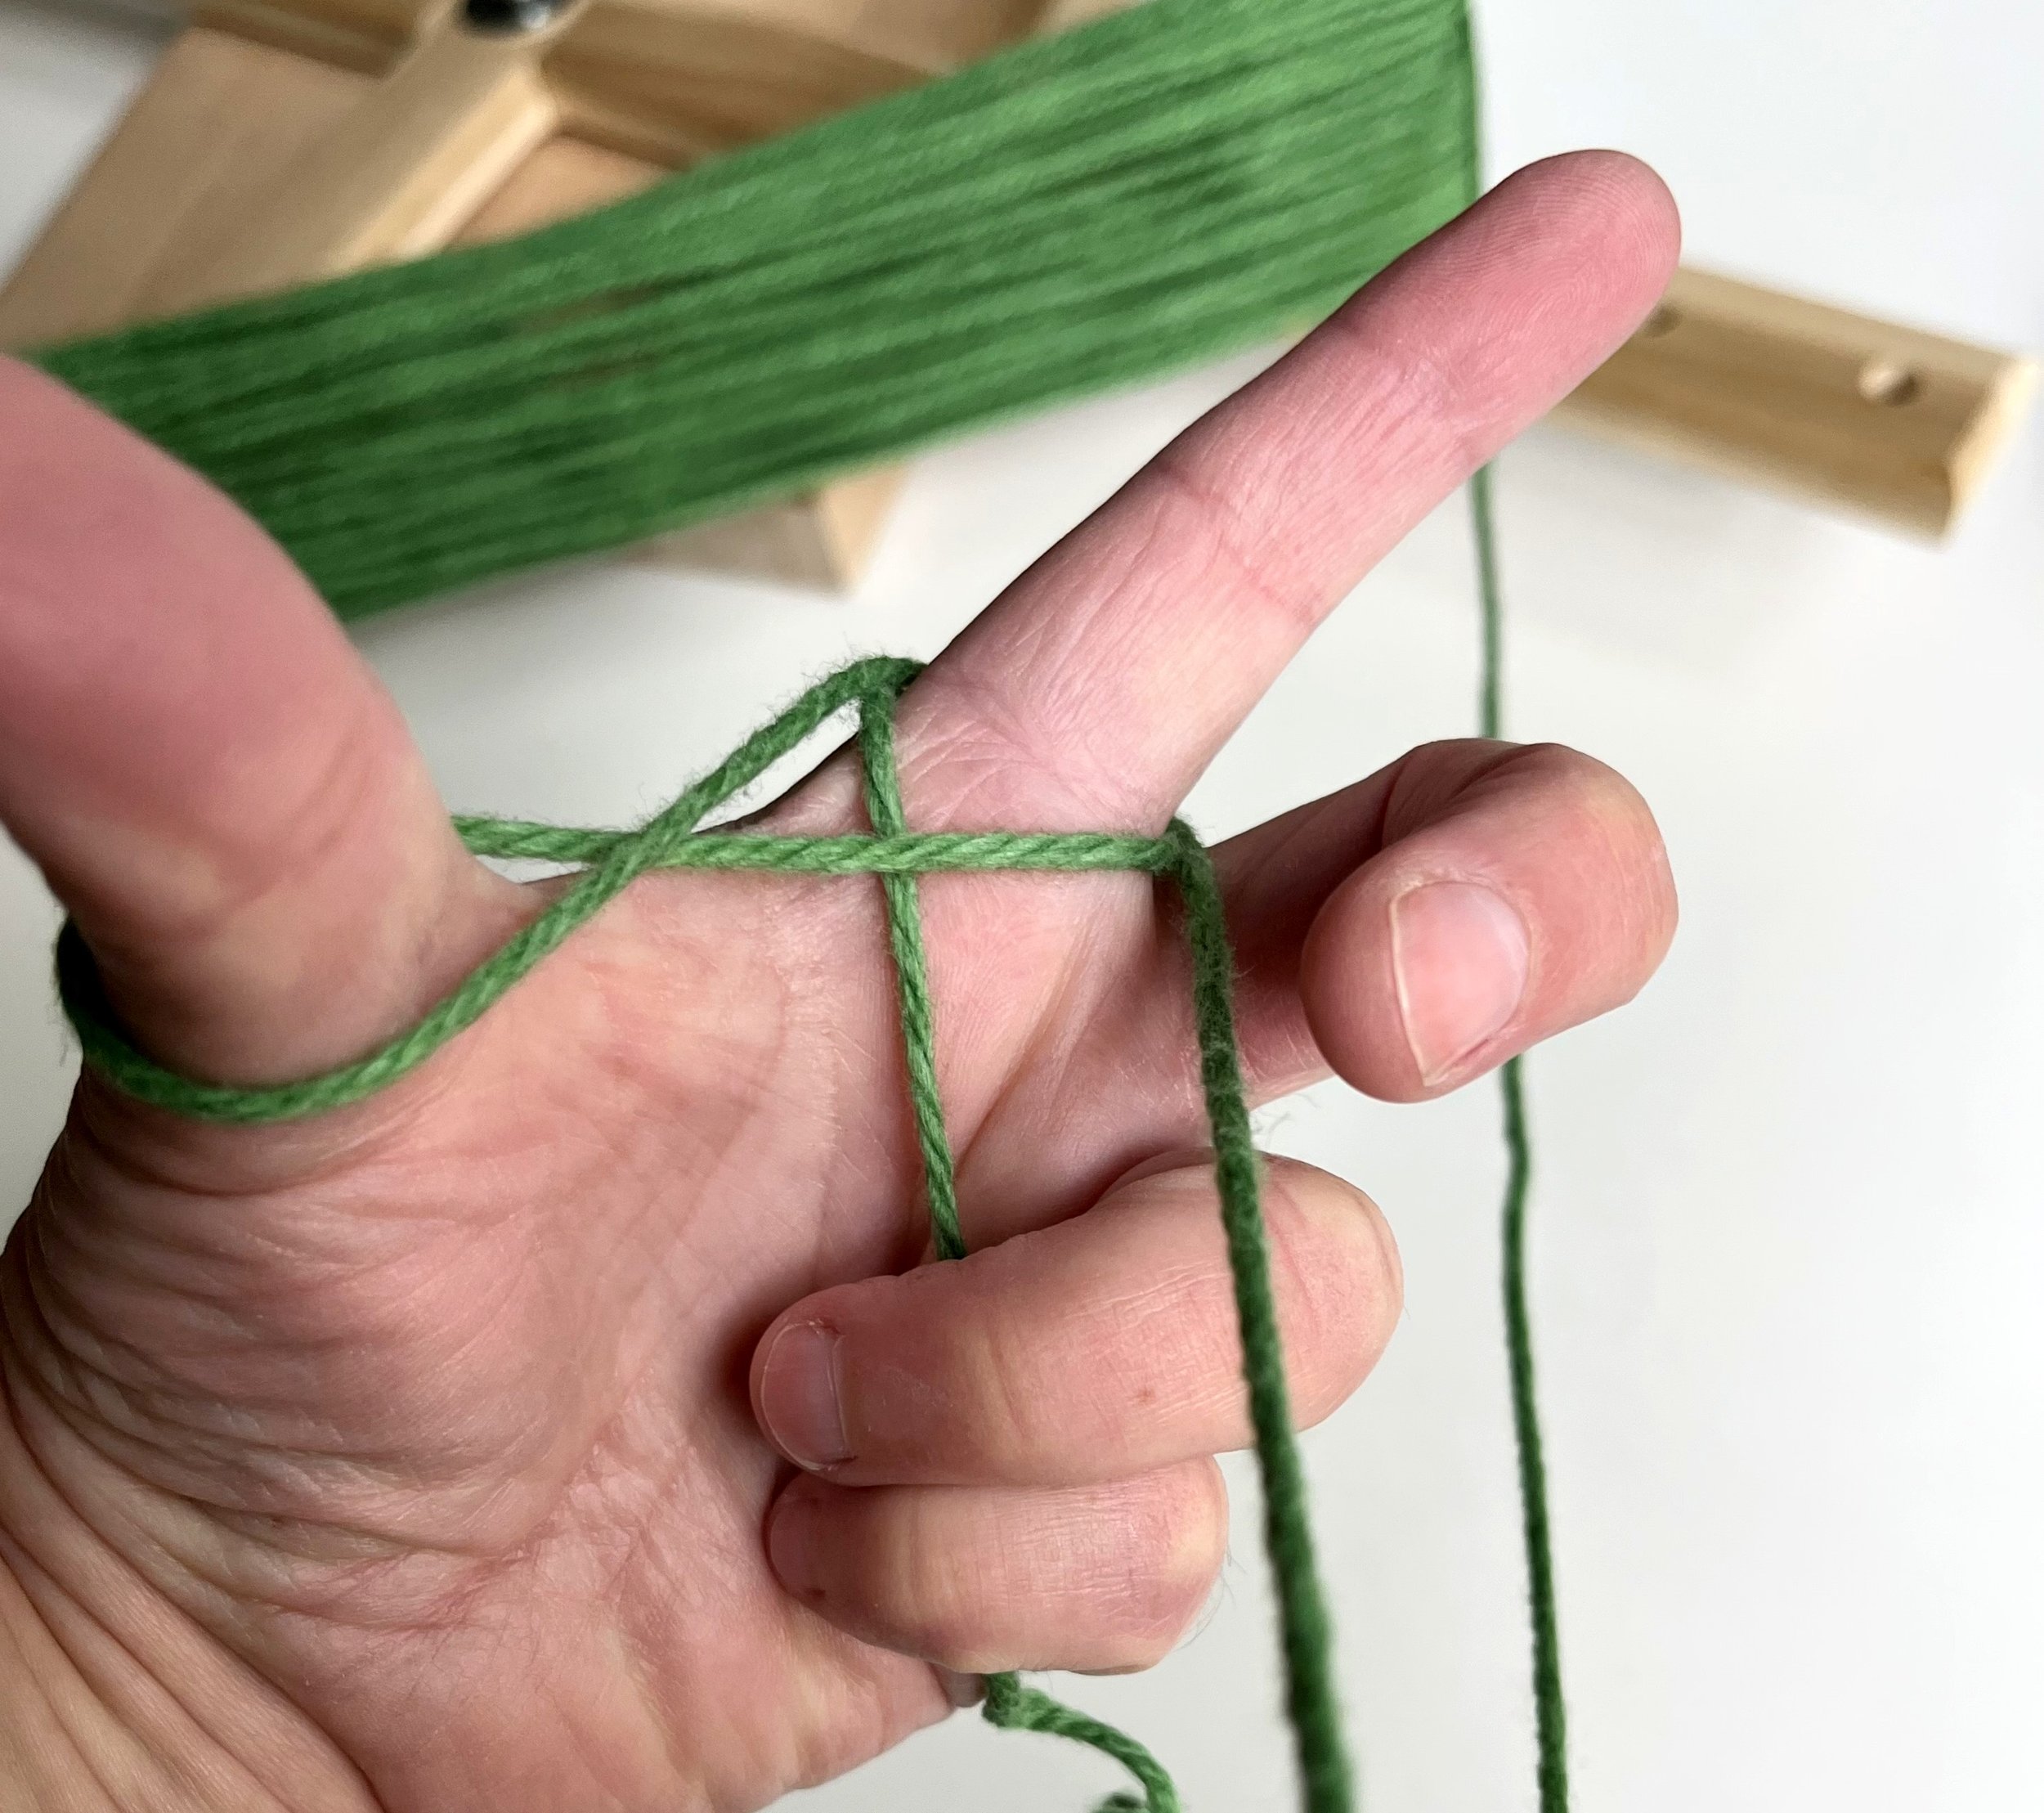
7. For best results, layer the wraps one above the other. To avoid annoying tangles later… don’t overlap the wraps!

Here’s a close up look at how I arrange the yarn on my fingers.
Keep wrapping the yarn until it reaches about the tip of your thumb. The yarn crisscrosses and forms sort of an “X” in the center.
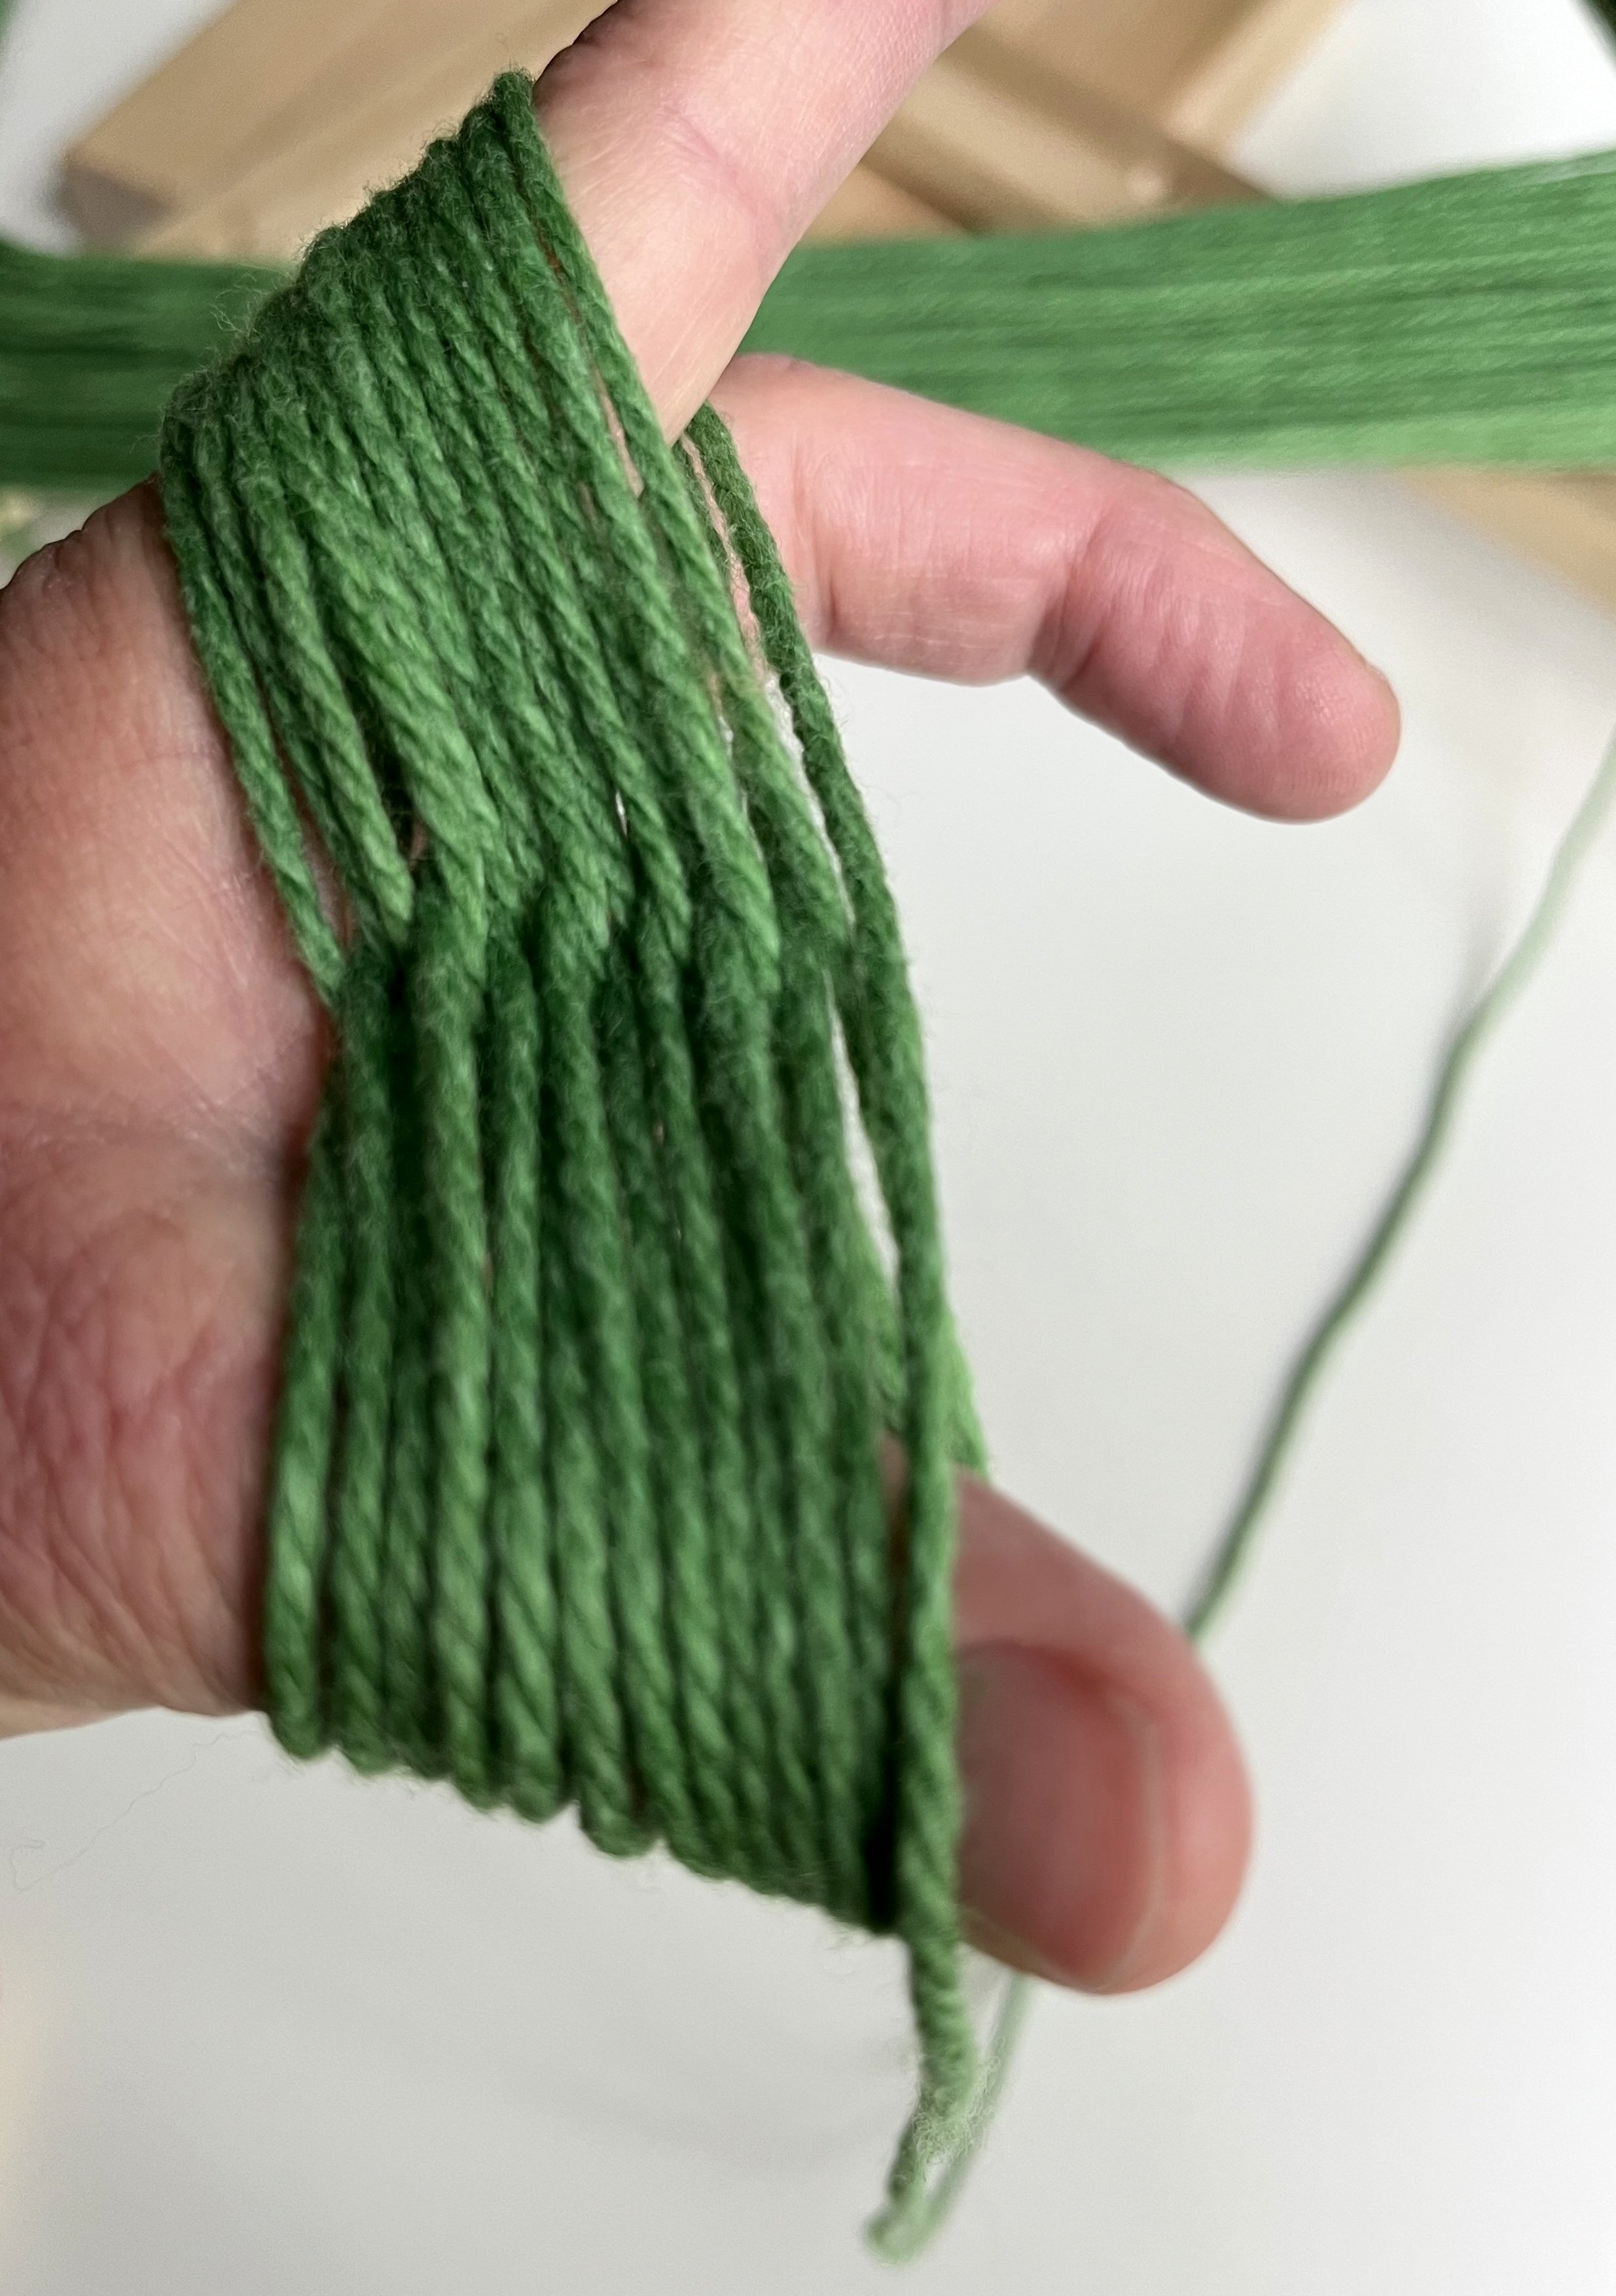
8. With your other hand, securely grab the center portion of the wrapped yarn (where the yarn crisscrosses and creates an “X”) and slide it off your hand.
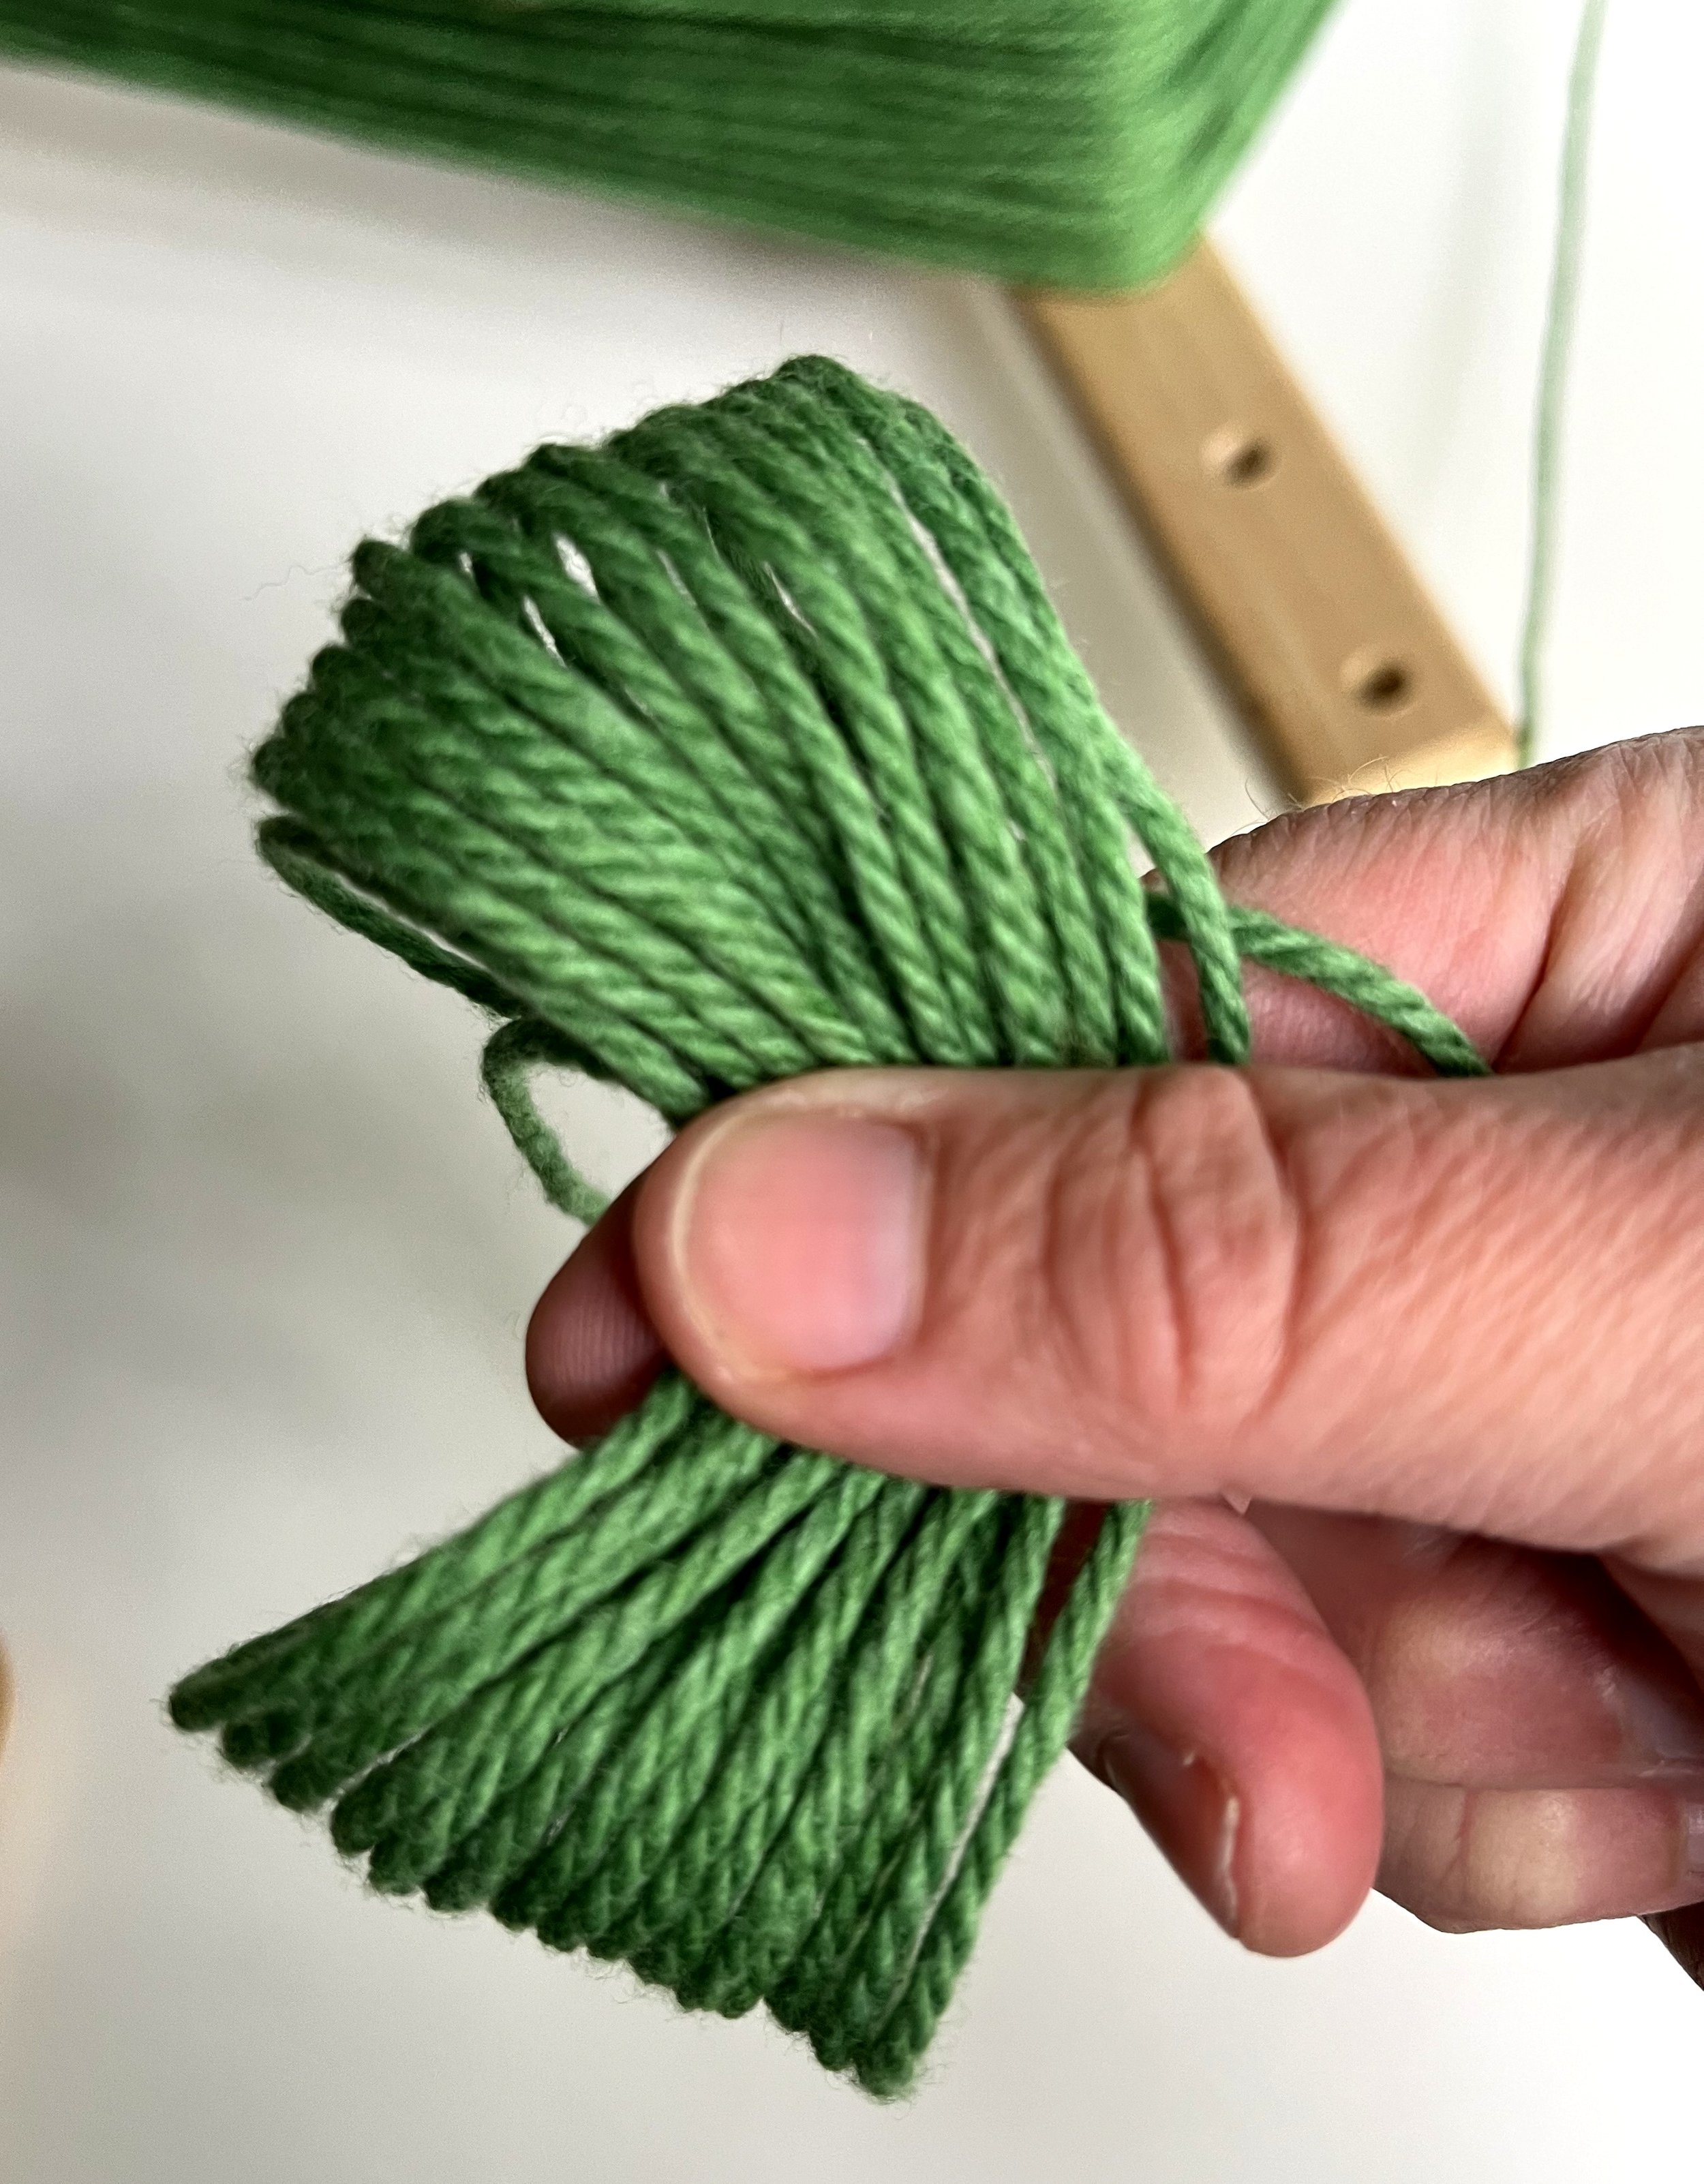
9. Then, transfer the yarn back to your original hand (this is my left hand in photo below)… carefully folding the bundle of yarn in half at the “X”. Make sure to keep hold of the end of the yarn (lower left in photo)… leaving a couple of inches sticking out.

10. While securely holding the bundle of yarn in one hand (I use my left hand)… with the thumb gripping the loops of yarn and the end of the yarn… start wrapping yarn from the skein loosely around the bundle. Avoid wrapping the yarn tightly! Wrapping tightly will cause headaches when pulling the yarn from the skein later. It’s going to look a bit messy at this point!

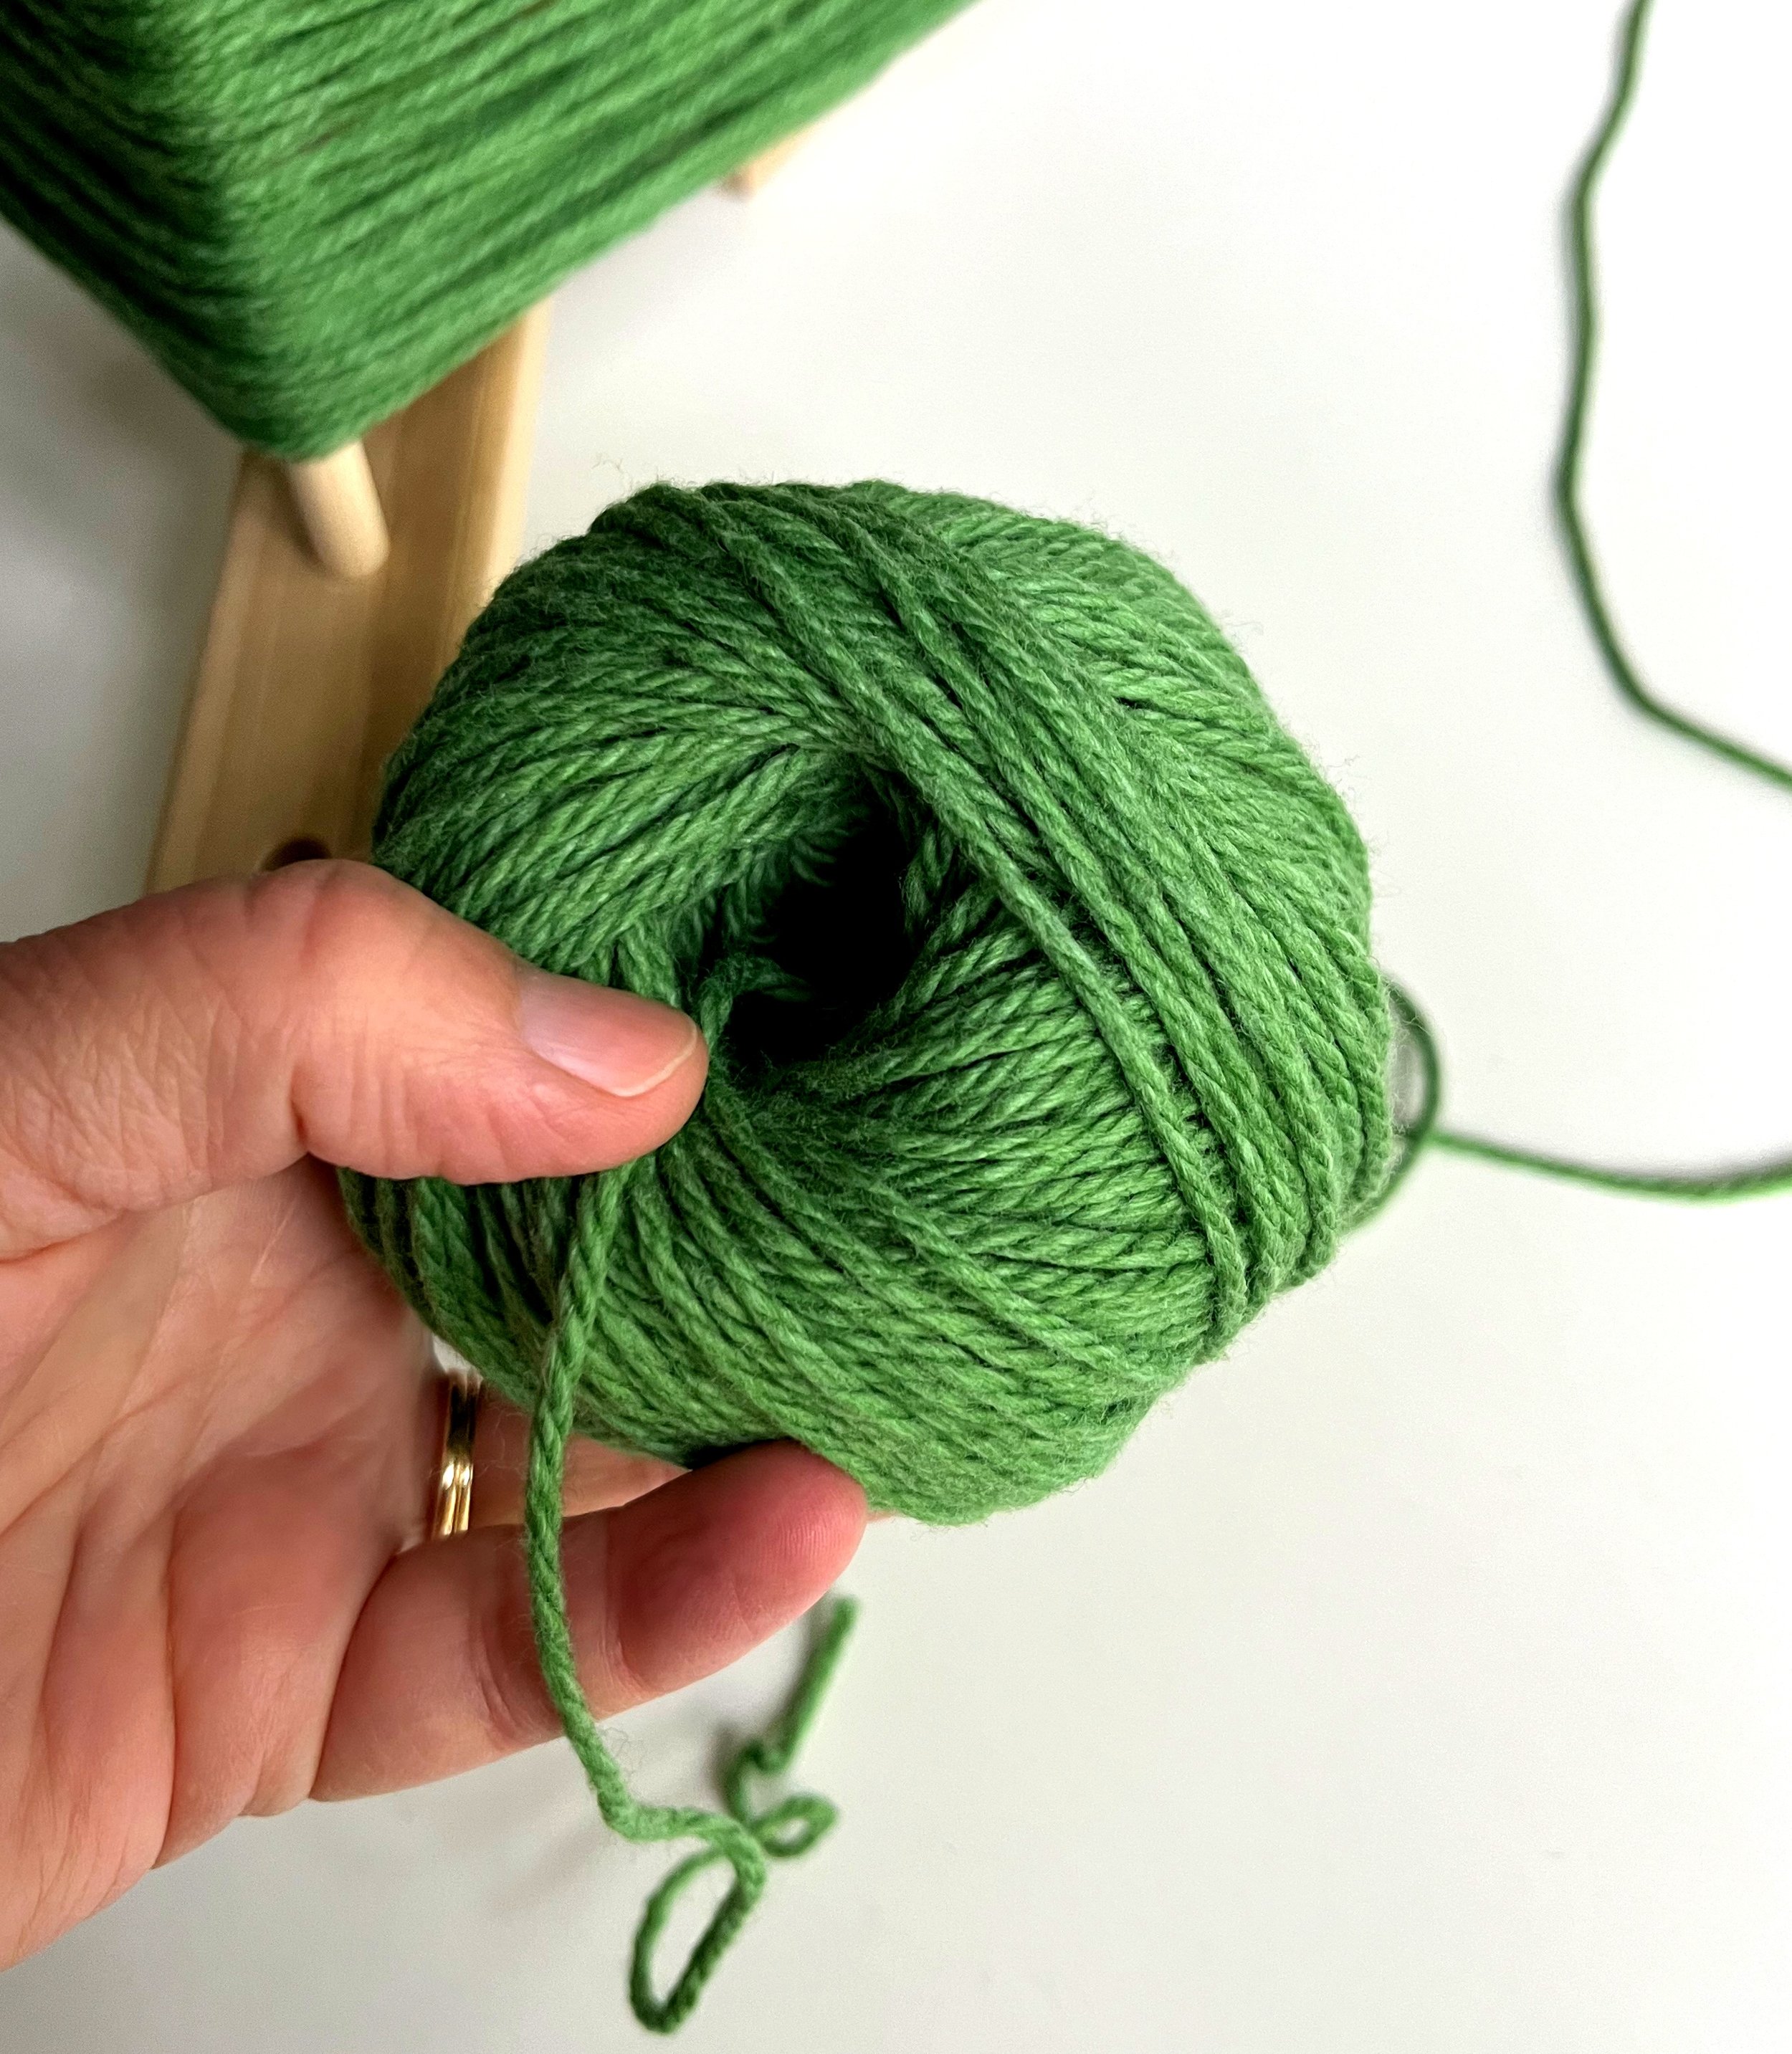
11. Keeping your thumb in the center by the original bundle of yarn… gently wrap the yarn from the skein about 6 - 8 times around the growing ball of yarn. Then, rotate the ball slightly and wrap 6 - 8 more times. Avoid the temptation to wrap tightly. Be sure to keep track of the starting end of yarn so it doesn’t get wrapped up! See the end of yarn in my hand in the lower left corner of the photo.
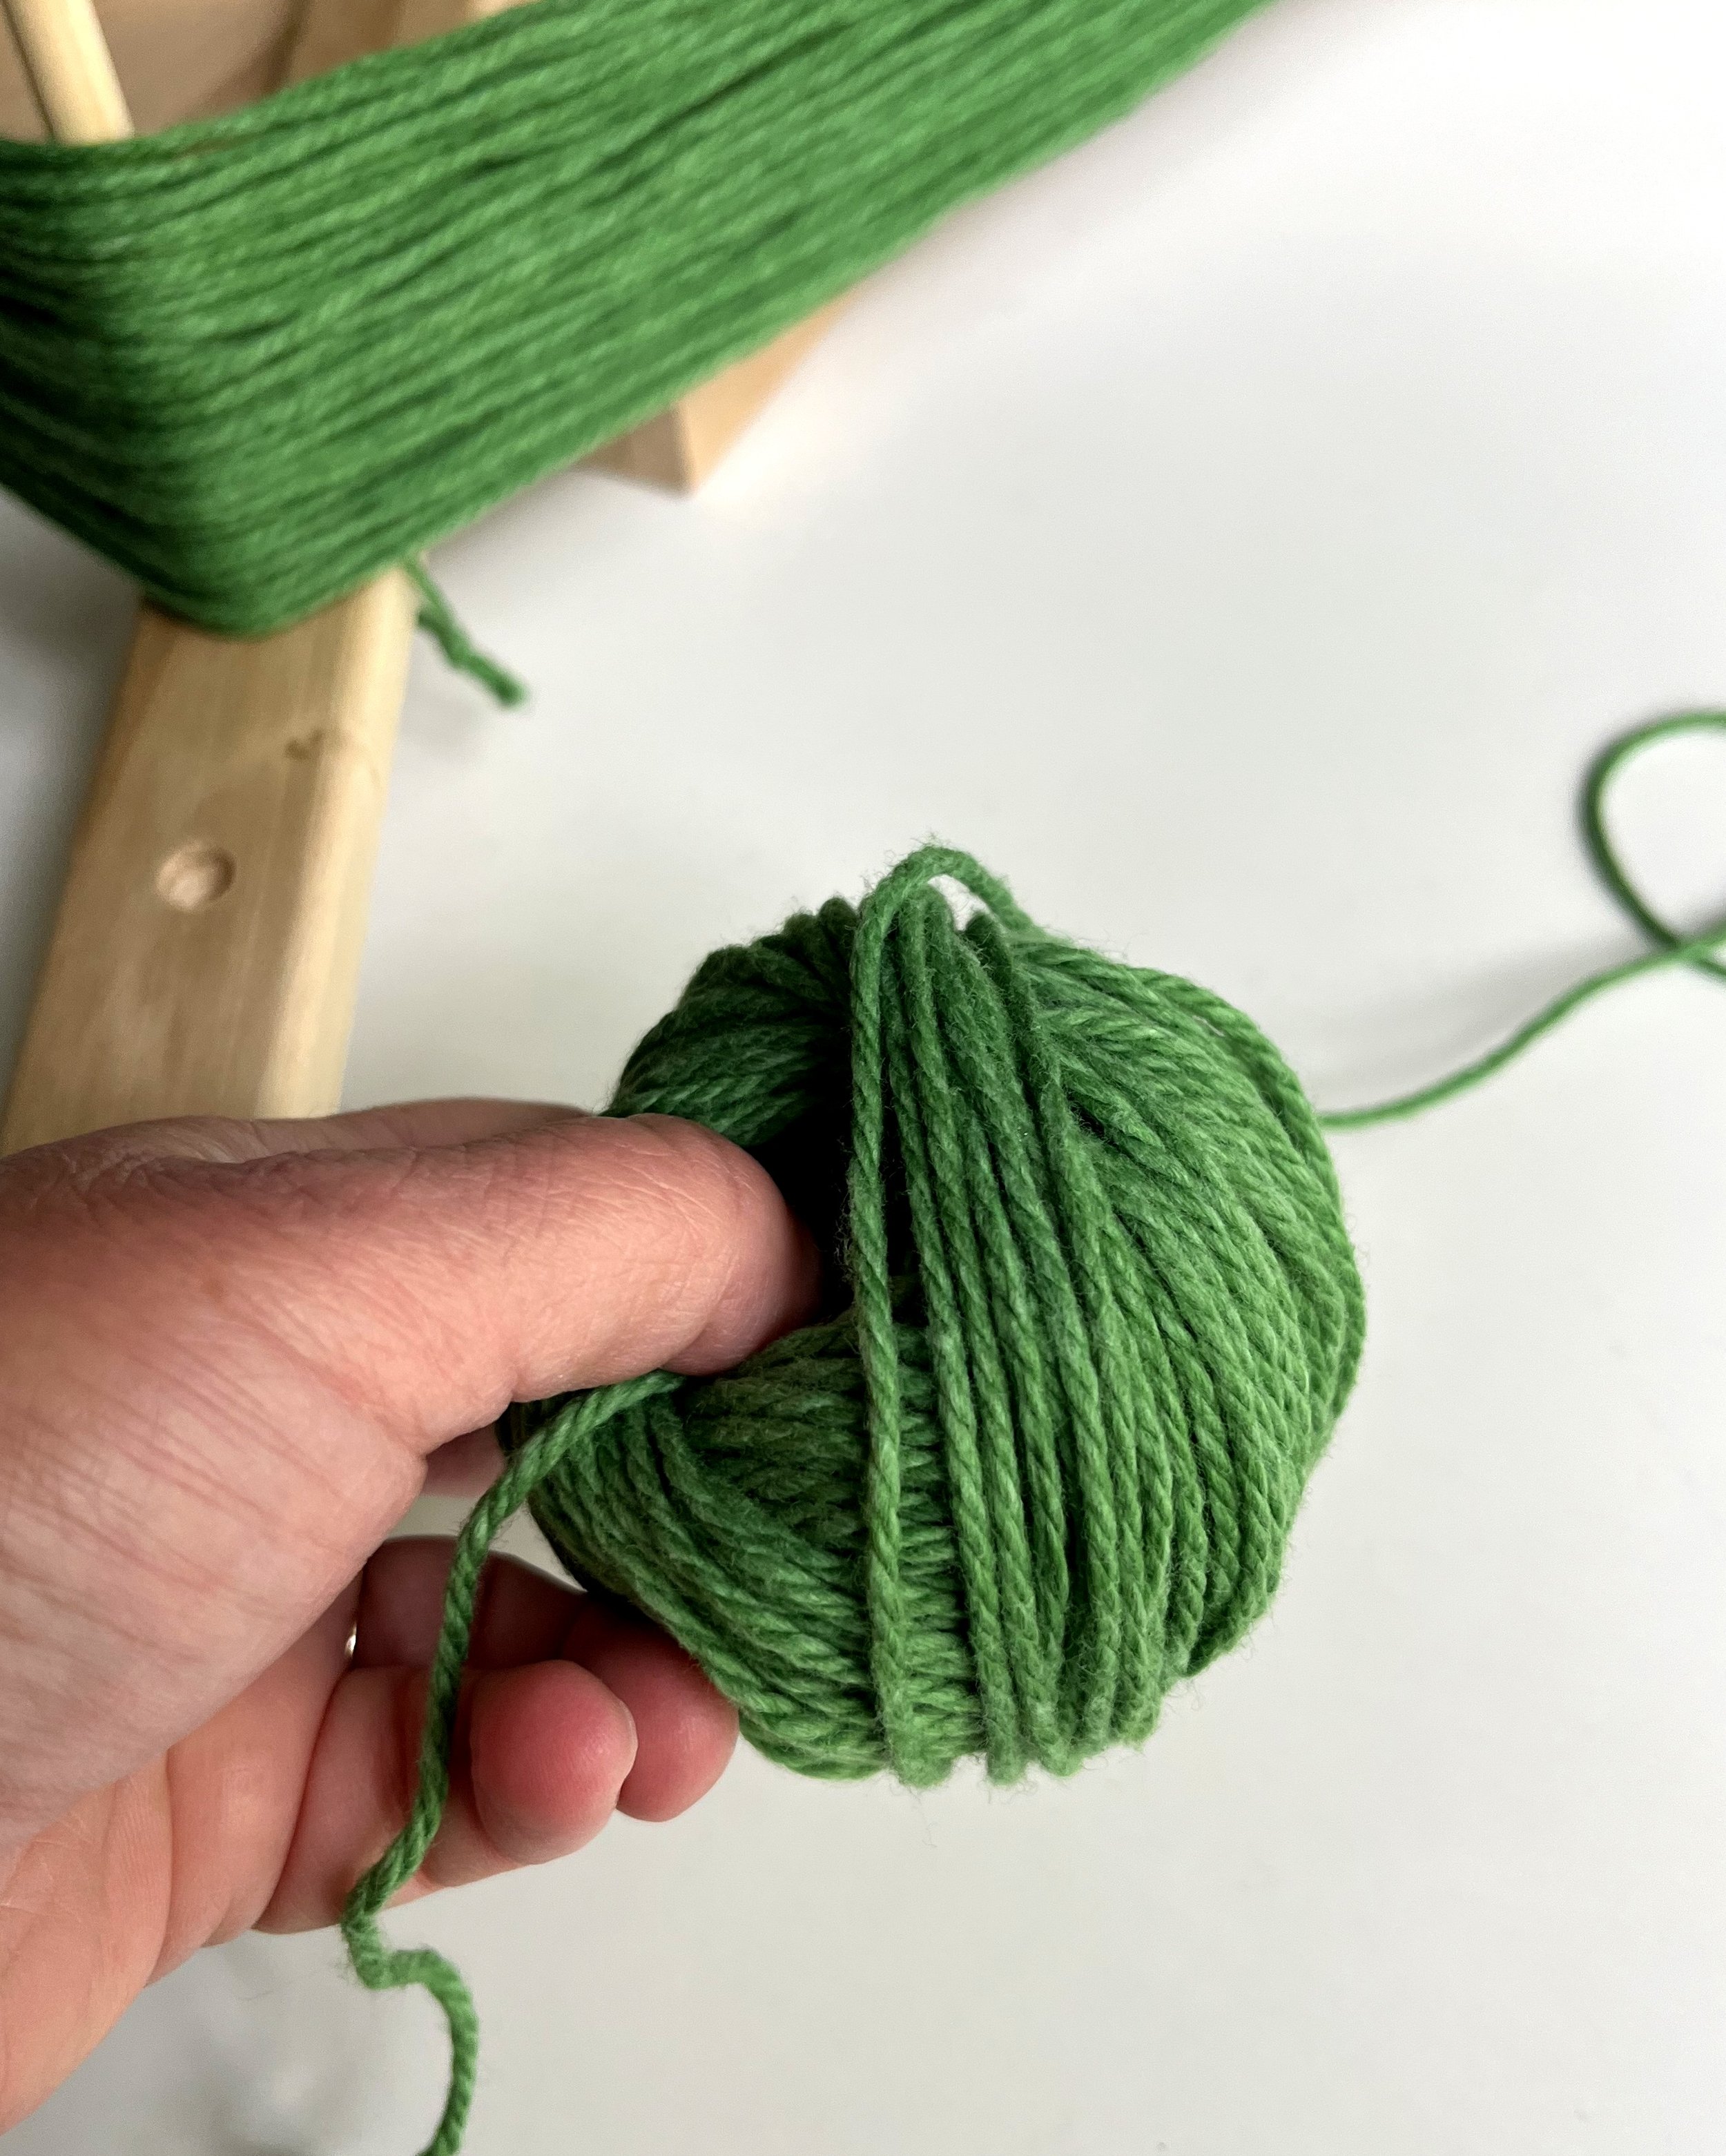
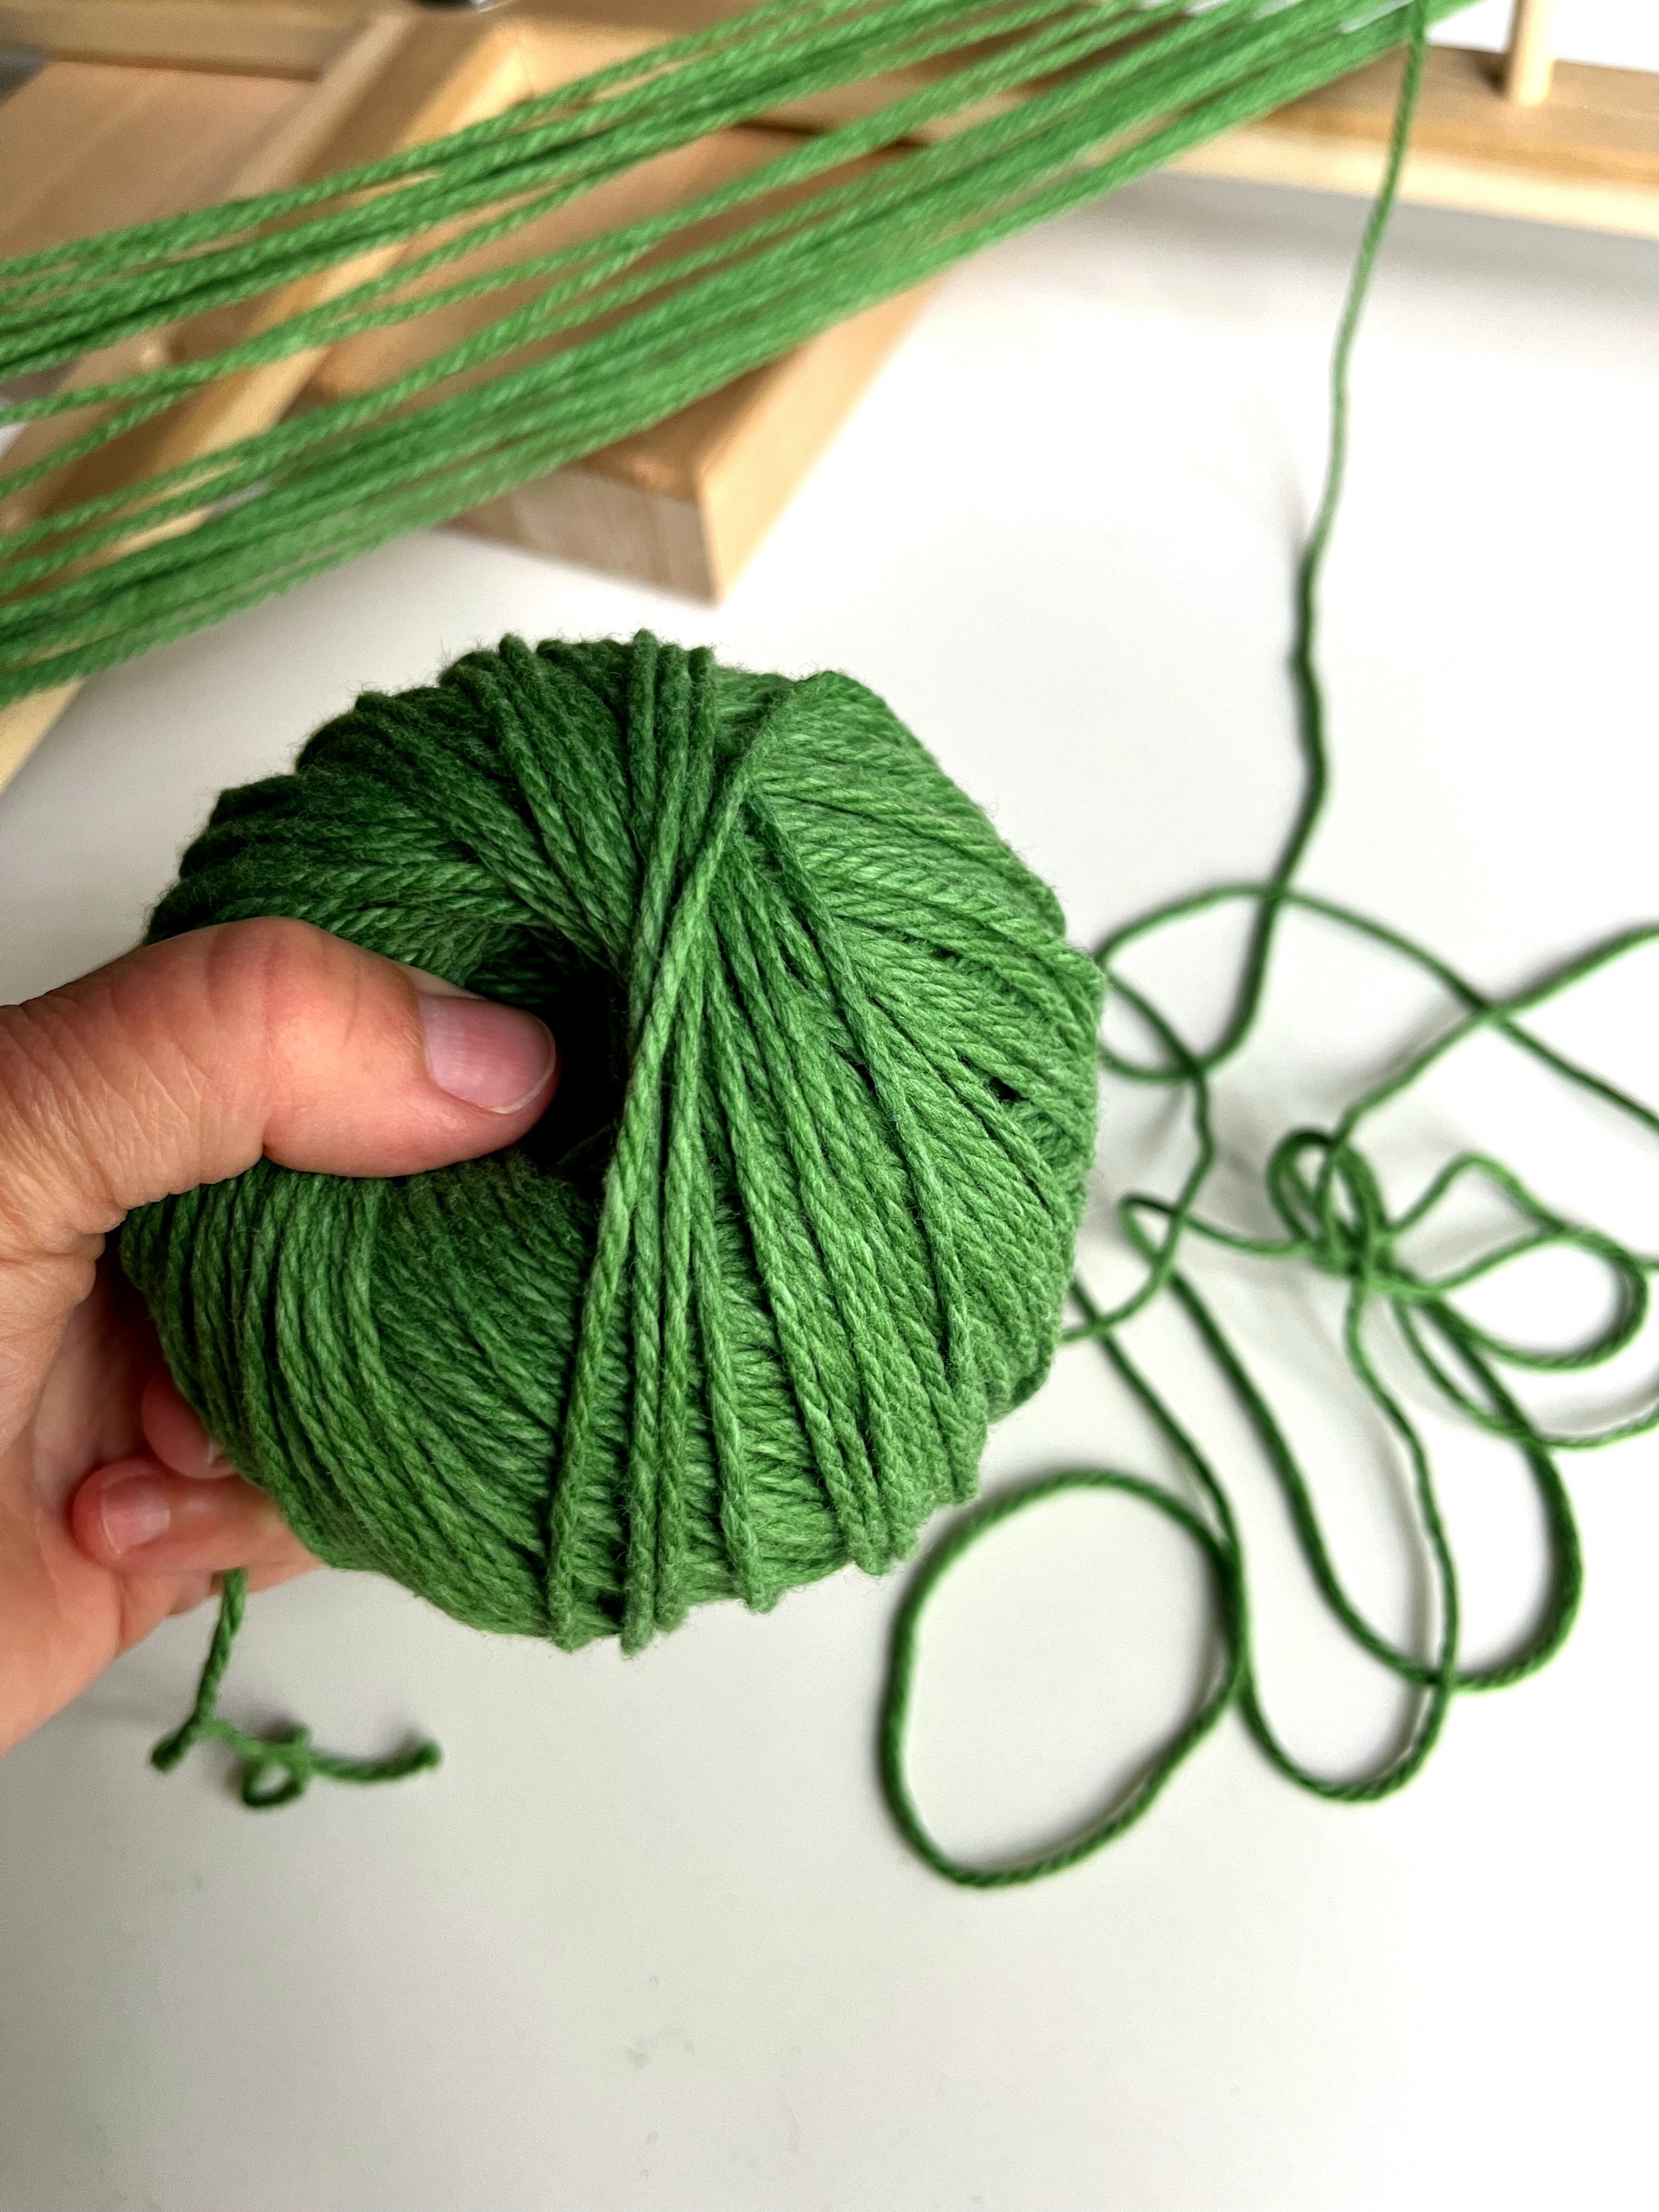
The center pull ball of yarn has grown! At this point, it’s easier to manage rotating the ball of yarn continuously when wrapping the yarn around the ball. Just remember… do not cover up the starting end of the yarn! And, do not cover up the “donut hole” center that is the “center pull” of the yarn ball.
Here you can see that there isn’t much yarn left on the swift (top of the photo).
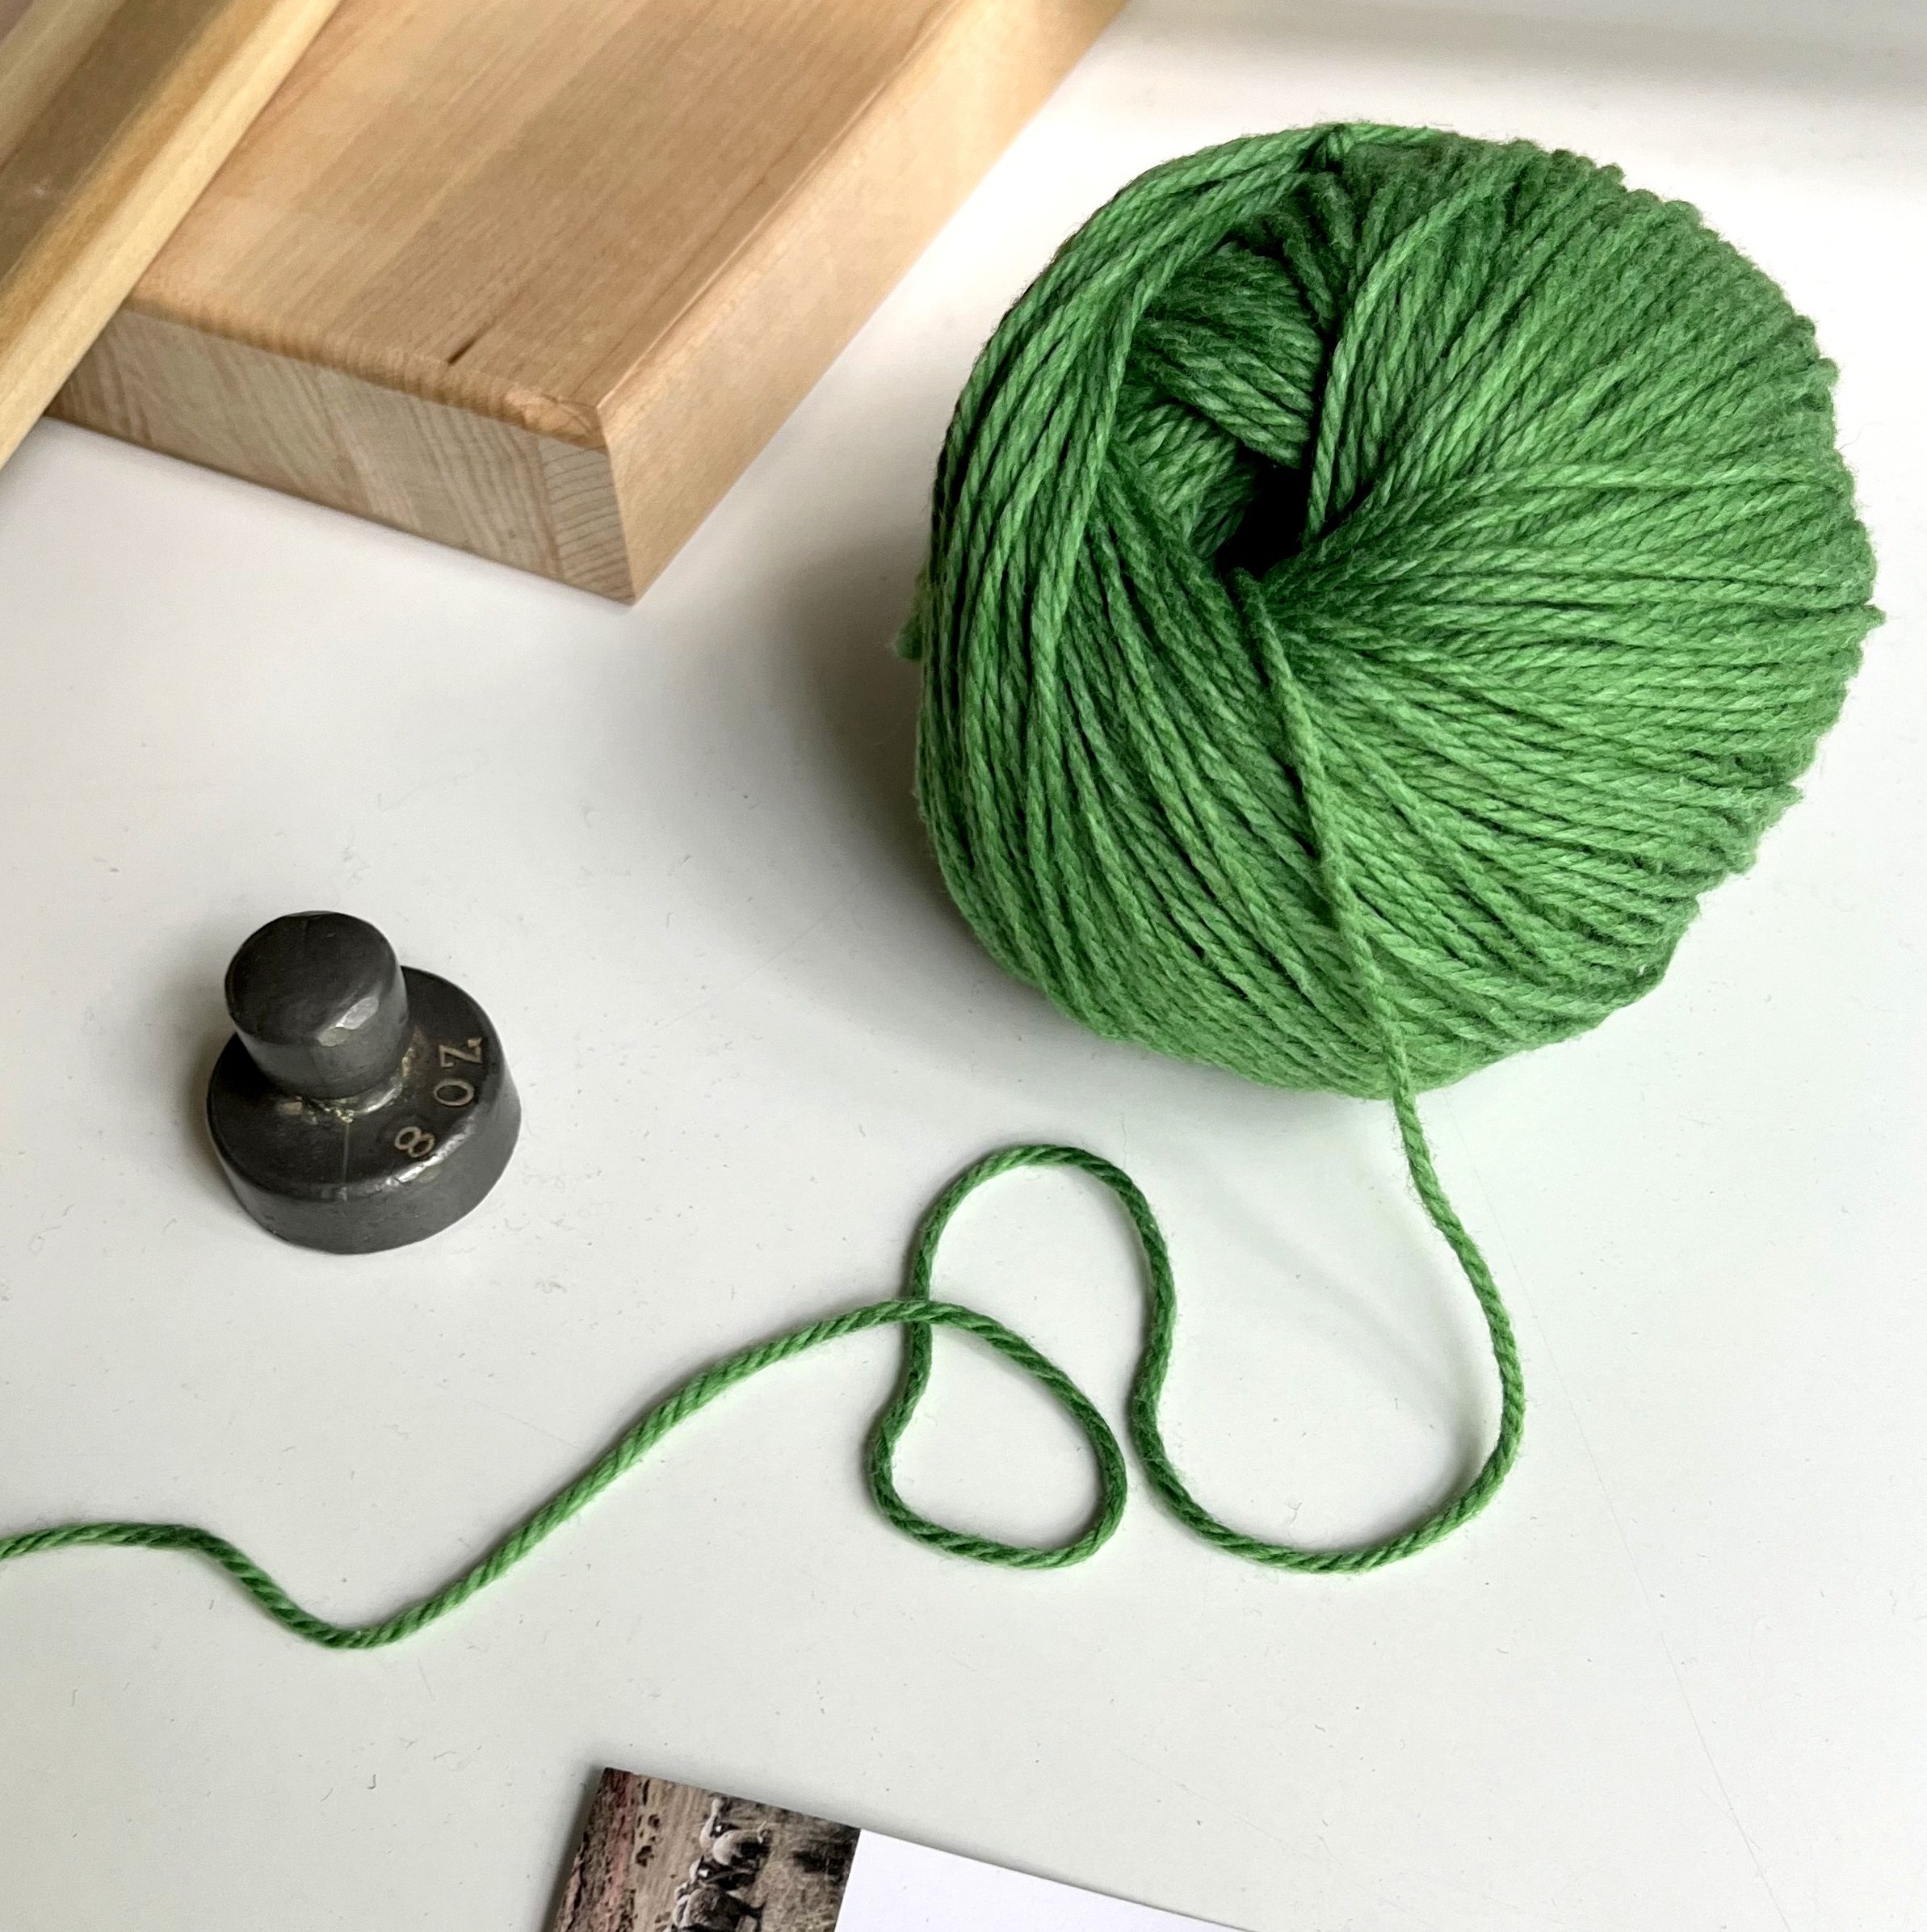
12. When all the yarn is wrapped into a neat ball of yarn, tuck the final end (the last two inches of the skein) under a few pieces of yarn to secure it. Pull the beginning end of yarn from the center to start your knitting or crochet project.
Thanks for taking a minute to check out my collection of knitting patterns!
Happy knitting!


